
Mastering Infrastructure as a Service with AWS
“The cloud is not about how you build infrastructure. It’s about how you use the flexibility it provides.”
Let’s face it – in today’s fast-paced digital world, cloud computing has evolved from just another tech buzzword into the very foundation of modern IT infrastructure. Look beyond the marketing hype, and you’ll discover a truly powerful concept that’s completely changing how businesses operate and scale their technology.
The Power of Cloud Computing
Think about it – cloud computing gives you on-demand access to computing resources whenever you need them. Need applications? Data centers? It’s all available over the internet, and you only pay for what you use. Remember the days of massive upfront server investments? That’s history! This clever shift from capital expenditure to operational expenditure has democratized access to enterprise-grade technology, making it accessible to businesses of all sizes. Even small startups can now leverage the same advanced infrastructure that was once the exclusive domain of tech giants.
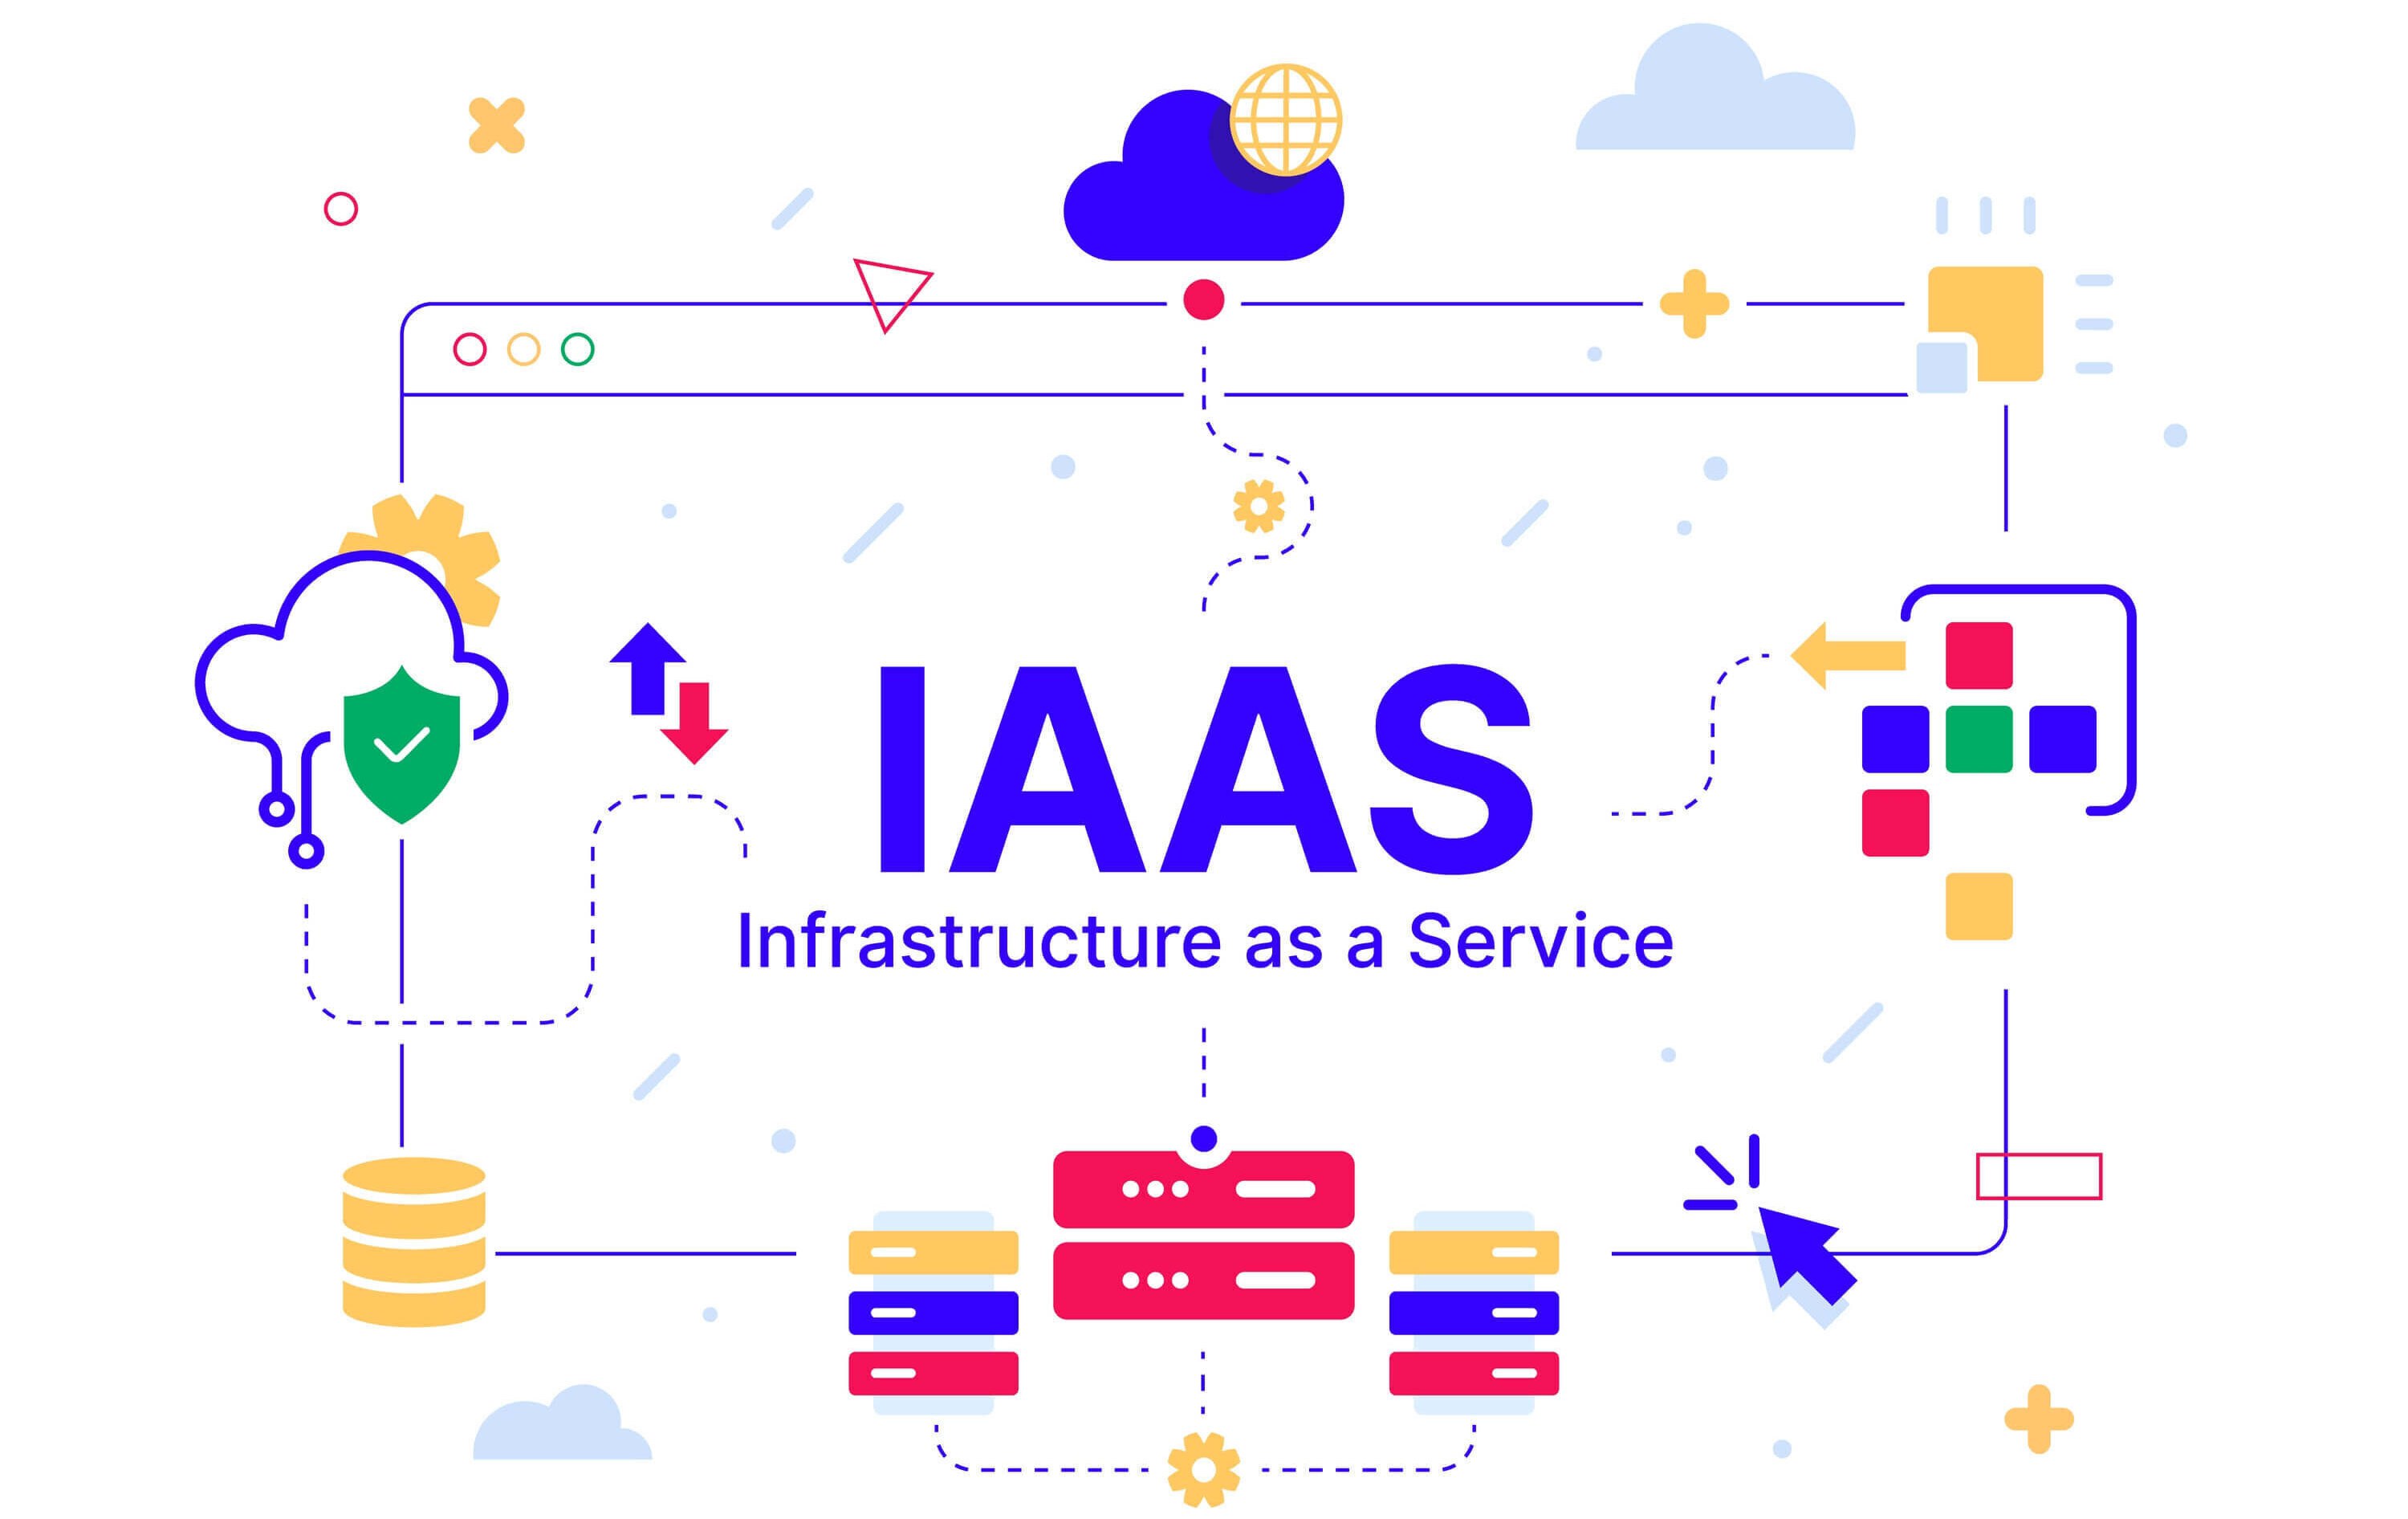
Understanding IaaS: The Foundation of Cloud Architecture
You’ve probably heard about the “cloud service models” – (SaaS, PaaS, and IaaS). While they’re all important, let’s focus on Infrastructure as a Service (IaaS) – it’s truly the most fundamental layer of them all. Think of IaaS as providing the essential building blocks for your cloud IT – the digital equivalent of the concrete, steel, and electrical systems of a physical building:
| Resource Type | What You Get | Traditional Equivalent |
|---|---|---|
| Compute | Virtual machines with configurable CPU and RAM | Physical servers in a data center |
| Storage | Block, object, and file storage options | SANs, NAS devices, and disk arrays |
| Networking | Virtual networks, subnets, IP addresses, load balancers | Routers, switches, firewalls, and load balancers |
| Security | Identity management, access control, encryption | Physical security, firewalls, and network policies |
Here’s what makes IaaS so powerful: it offers you the highest level of flexibility and management control over your IT resources. Instead of dropping a fortune on hardware that might be obsolete next year, you can rent exactly what you need, precisely when you need it. Need more power during holiday shopping season? Scale up. Slower summer months? Scale down. All this flexibility while still maintaining complete control over how everything is configured and managed. It’s your infrastructure, just without the headaches of physical ownership.
AWS: The Pioneer of Cloud IaaS
Let’s talk about the elephant in the room when it comes to IaaS providers – Amazon Web Services (AWS). AWS isn’t just another player; they’re the pioneer who blazed the trail and remain the industry leader today. When AWS launched back in 2006, they didn’t just enter the market – they fundamentally changed the entire game of how businesses approach IT infrastructure. Look at what they bring to the table:
- An incredible lineup of over 200 fully featured services you can access from practically anywhere on Earth
- A massive global footprint spanning 27 geographic regions with 87 availability zones – meaning your applications can be closer to your users
- Rock-solid security capabilities and compliance certifications that let you sleep at night
- Unmatched scale and reliability whether you’re a scrappy startup or a Fortune 500 giant
Ready to dive in? Throughout this comprehensive guide, I’ll show you how to harness AWS’s powerful IaaS offerings to build cloud solutions that are robust, scalable, and cost-effective – the kind that can truly transform what your infrastructure can do.
What We’ll Cover
| Section | Key Learning |
|---|---|
| Deploying Web Applications | Building scalable infrastructure with EC2, ALB, and ASG |
| Path-Based Routing | Directing traffic to different services using ALB rules |
| Advanced Networking | Implementing private/public subnets with secure bastion access |
| Domain Configuration | Setting up end-to-end routing for multi-port applications with Route 53 |
| Cross-Account VPC Peering | Establishing secure connectivity between AWS accounts |
| EBS & AMI Management | Creating snapshots and images for data persistence |
| IAM Policy Creation | Implementing fine-grained access control for EC2 |
| S3 Bucket Operations | Managing storage using AWS CLI |
Deploying a Web Application on AWS
What You’ll Learn
- Setting up EC2 instances and installing web server software
- Creating an Application Load Balancer for traffic distribution
- Configuring Auto Scaling Groups to automatically adjust capacity
- Testing and verifying scaling behavior under load
In this section, we’re going to roll up our sleeves and build something special – a truly resilient and scalable web application infrastructure on AWS. We’ll bring together multiple IaaS components like pieces of a puzzle to create a robust architecture that doesn’t just handle traffic but automatically adjusts to demands. No more late-night scrambles when your site hits the front page of Reddit!
flowchart TD
    User([User]) -->|HTTP Request| ALB[Application Load Balancer]
    ALB -->|Traffic Distribution| ASG{Auto Scaling Group}
    ASG -->|Scales Out| EC2_1[EC2 Instance 1]
    ASG -->|Scales Out| EC2_2[EC2 Instance 2]
    ASG -->|Scales Out| EC2_N[EC2 Instance N]
    CloudWatch[CloudWatch Metrics] -->|Triggers| ASG
    EC2_1 -->|Reports Metrics| CloudWatch
    EC2_2 -->|Reports Metrics| CloudWatch
    EC2_N -->|Reports Metrics| CloudWatch

    classDef aws fill:#FF9900,stroke:#232F3E,color:white
    class User,ALB,ASG,EC2_1,EC2_2,EC2_N,CloudWatch aws
Key Concepts
| Concept | Description |
|---|---|
| EC2 (Elastic Compute Cloud) | Virtual servers in the cloud that provide resizable compute capacity |
| ALB (Application Load Balancer) | Distributes incoming application traffic across multiple targets |
| ASG (Auto Scaling Group) | Maintains application availability by automatically adding or removing EC2 instances |
| AMI (Amazon Machine Image) | Pre-configured templates used for EC2 instance creation |
| Launch Template | Contains configuration information to launch instances in an ASG |
Task 1: Deploy Web Application on EC2 Instances
Steps:
-
Launch EC2 Instances:
- Navigate to EC2 dashboard > Launch Instances
- Select Ubuntu Server 22.04 LTS, choose
t2.micro(free tier eligible) - Configure network settings with security groups allowing HTTP/SSH
- Launch at least two instances across different AZs with a key pair
-
Connect and Configure Instances:
ssh -i "your-key.pem" ubuntu@instance-public-ip sudo apt update sudo apt install -y nginx sudo systemctl start nginx sudo systemctl enable nginx -
Deploy Application:
 sudo tee /var/www/html/index.html > /dev/null << EOF
 <!DOCTYPE html>
 <html>
 <head>
     <title>AWS Web Application</title>
 </head>
 <body>
     <div class="container">
         <h1>Hello from <span class="aws-color">AWS</span>!</h1>
         <h3>Instance ID: $(curl -s http://169.254.169.254/latest/meta-data/instance-id)</h3>
         <p>This page is being served from an Amazon EC2 instance.</p>
     </div>
 </body>
 </html>
 EOF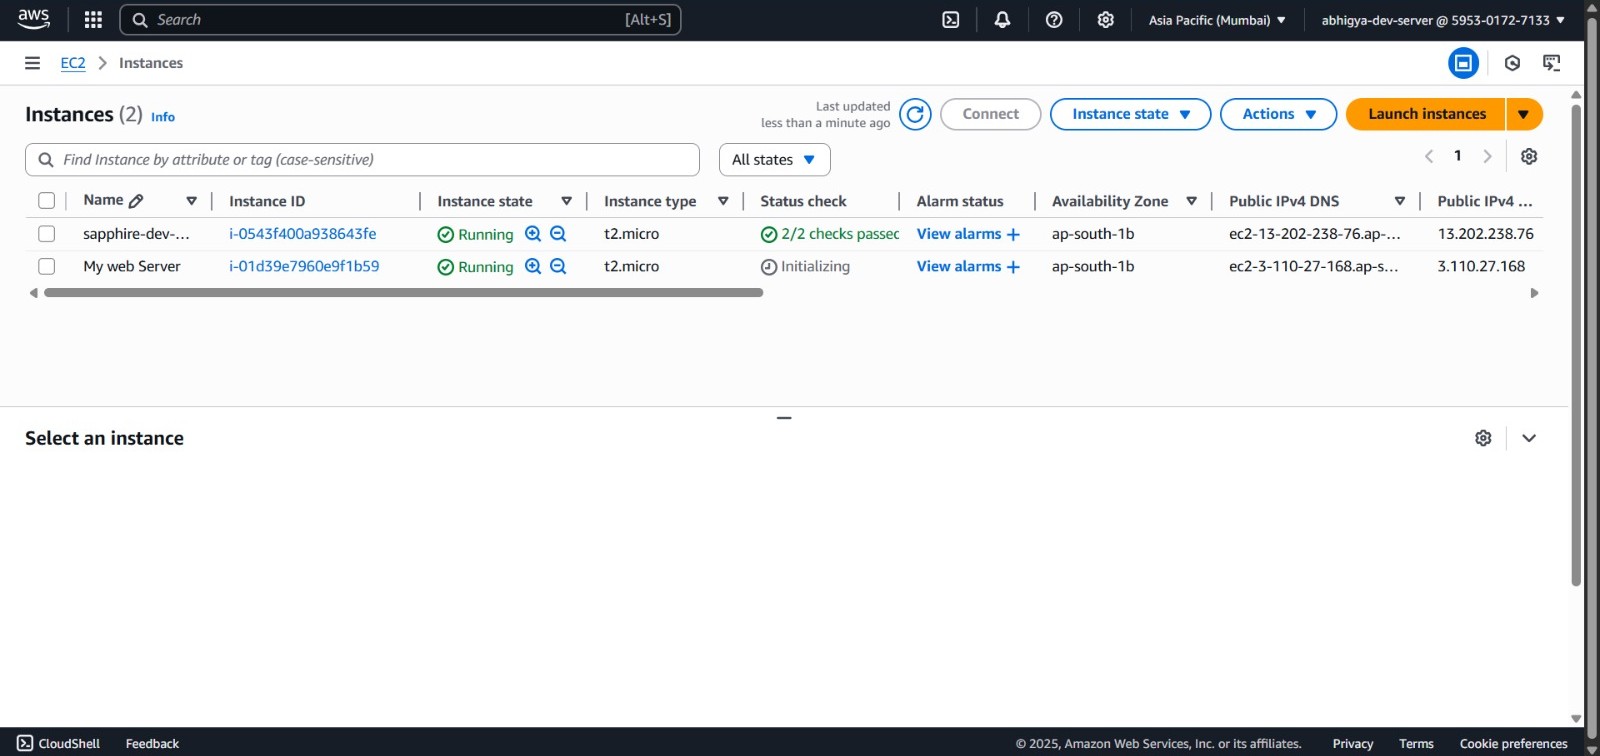
-
Verify Deployment:
- Access each instance’s public IP/DNS in a browser
- Confirm the application is running correctly
Task 2: Set Up an Application Load Balancer (ALB)
Steps:
-
Create Target Group:
- In the AWS Management Console, navigate to the EC2 dashboard
- From the left navigation pane, select “Target Groups” under the “Load Balancing” section
- Click the “Create target group” button
- For target type, select “Instances” (since we’re routing to EC2 instances)
- Enter
web-target-groupin the “Target group name” field - Ensure Protocol is set to HTTP and Port is set to 80
- Select your VPC from the dropdown menu
- In the Health check settings section:
- Confirm the protocol is HTTP
- For Health check path, enter
/(this is the root path of your web server) - You can keep default values for other health check settings, or adjust as needed:
- Healthy threshold: 5 (consecutive successful checks required)
- Unhealthy threshold: 2 (consecutive failed checks to mark unhealthy)
- Timeout: 5 seconds (time to wait for response)
- Interval: 30 seconds (time between health checks)
- Click “Next” to proceed to target registration
- Select the EC2 instances you created in Task 1
- Click “Include as pending below” to add them to the target group
- Verify the instances appear in the list with port 80
- Click “Create target group” to finalize
-
Create Load Balancer:
- Navigate to the EC2 dashboard in your AWS console
- In the left navigation menu, click on “Load Balancers” then click “Create load balancer”
- Select “Application Load Balancer” from the options (this type handles HTTP/HTTPS traffic)
- For the basic configuration:
- Name: Enter
web-application-lbas your load balancer name - Scheme: Select “Internet-facing” (this makes your ALB accessible from the internet)
- IP address type: Leave as “IPv4”
- Name: Enter
- For Network settings:
- Select your VPC from the dropdown
- Expand “Mappings” and select at least two different Availability Zones with public subnets
- This redundancy ensures high availability even if one AZ fails
- For Security groups:
- Create or select a security group that allows inbound HTTP (port 80) traffic
- Make sure the security group allows traffic from your expected sources (0.0.0.0/0 for public access)
- For Listeners and routing:
- Confirm the default HTTP:80 listener is added
- In the “Default action” section, select “Forward to target group” and choose your
web-target-group
- Review settings and click “Create load balancer”
-
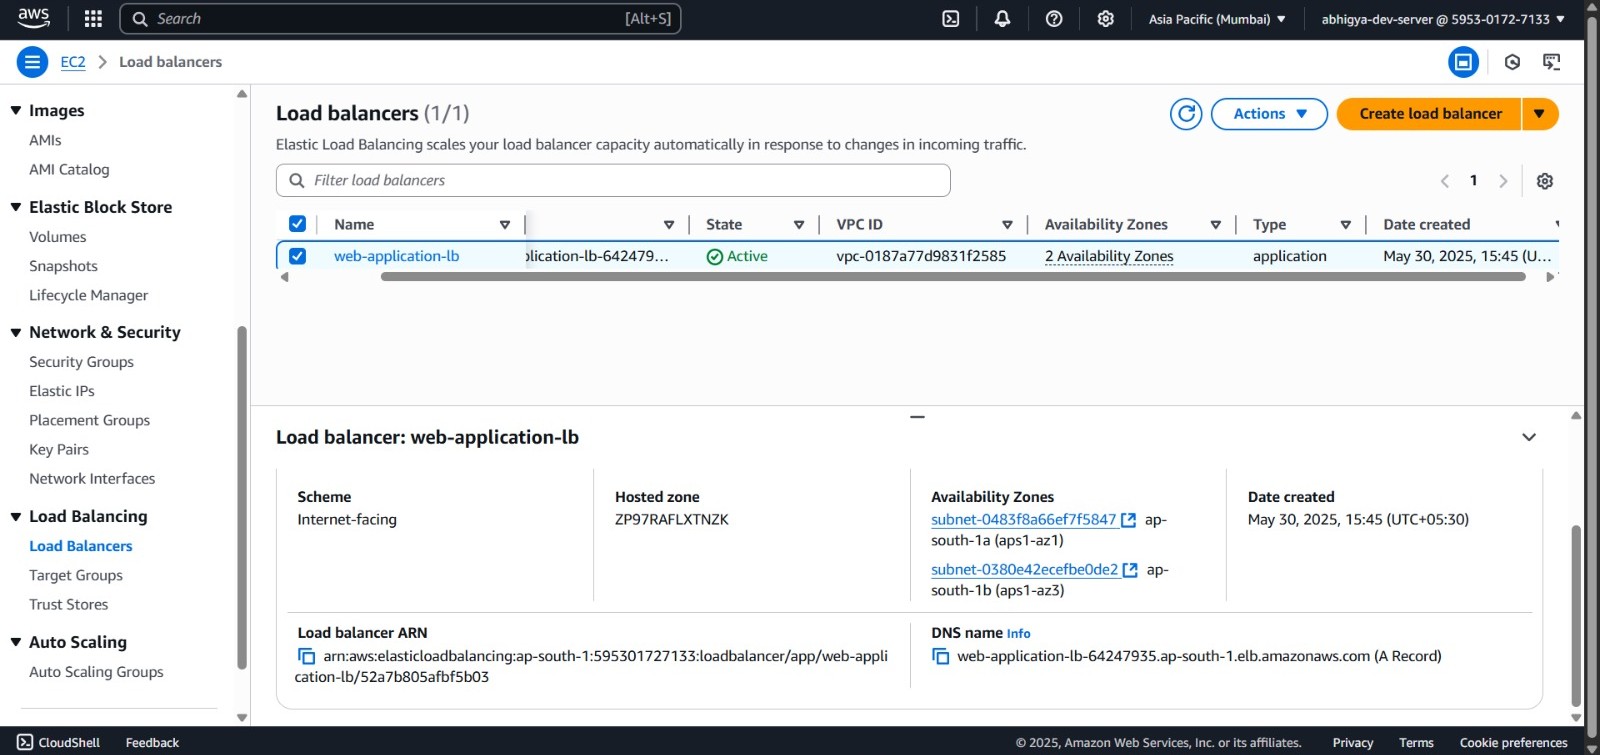
Verify Load Balancer:
- After creation, wait for the ALB to transition from “Provisioning” to “Active” state (~2-5 minutes)
- Once active, locate and copy the ALB’s DNS name from the “Description” tab (it will look like
web-application-lb-1234567890.ap-south-1.elb.amazonaws.com) - Open a new browser tab and paste this DNS name into the address bar
- You should see your web application page load successfully
- Try reloading the page multiple times (press F5 or Ctrl+R) and observe the “Instance ID” value changing
- This confirms that your load balancer is correctly distributing traffic across your EC2 instances
- If the page doesn’t load, check that your:
- Target group has healthy instances (Target groups > your target group > Targets tab)
- Security groups are correctly configured (allowing HTTP on port 80)
- EC2 instances are running properly (can be accessed directly via their IP)
Task 3: Configure Auto Scaling Group (ASG)
Steps:
-
Create Launch Template:
- Return to the EC2 dashboard in AWS Management Console
- In the left navigation pane under “Instances”, click on “Launch Templates”
- Click the “Create launch template” button
- For the basic settings:
- Launch template name: Enter
web-launch-template - Description: Add “Template for web server auto scaling group” (descriptions help track resources)
- Check “Provide guidance to help me set up a template that I can use with EC2 Auto Scaling”
- Launch template name: Enter
- For Application and OS Images:
- Click “Browse more AMIs” and select the same Ubuntu Server 22.04 LTS AMI used previously
- Note the AMI ID for consistency (should match your existing instances)
- For Instance type:
- Select the same instance type as your existing instances (e.g.,
t2.micro)
- Select the same instance type as your existing instances (e.g.,
- For Key pair:
- Select the same key pair you used for your initial instances
- For Network settings:
- Select “Don’t include in launch template” for network interface (ASG will configure this later)
- For Security groups:
- Select the security group that allows HTTP (80) and SSH (22) access
- Ensure it’s the same one used for your existing web instances for consistency
- Under Advanced details:
- Scroll down to the “User data” section
- Select “Text” and paste the following script (this will run on instance launch)
#!/bin/bash sudo apt update sudo apt install -y nginx sudo systemctl start nginx sudo systemctl enable nginx # Create custom index page sudo tee /var/www/html/index.html > /dev/null << EOF <!DOCTYPE html> <html> <head> <title>AWS Web Application</title> </head> <body> <div class="container"> <h1>Hello from <span class="aws-color">AWS</span>!</h1> <h3>Instance ID: \$(curl -s http://169.254.169.254/latest/meta-data/instance-id)</h3> <p>This page is being served from an Amazon EC2 instance.</p> </div> </body> </html> EOF -
Create Auto Scaling Group:
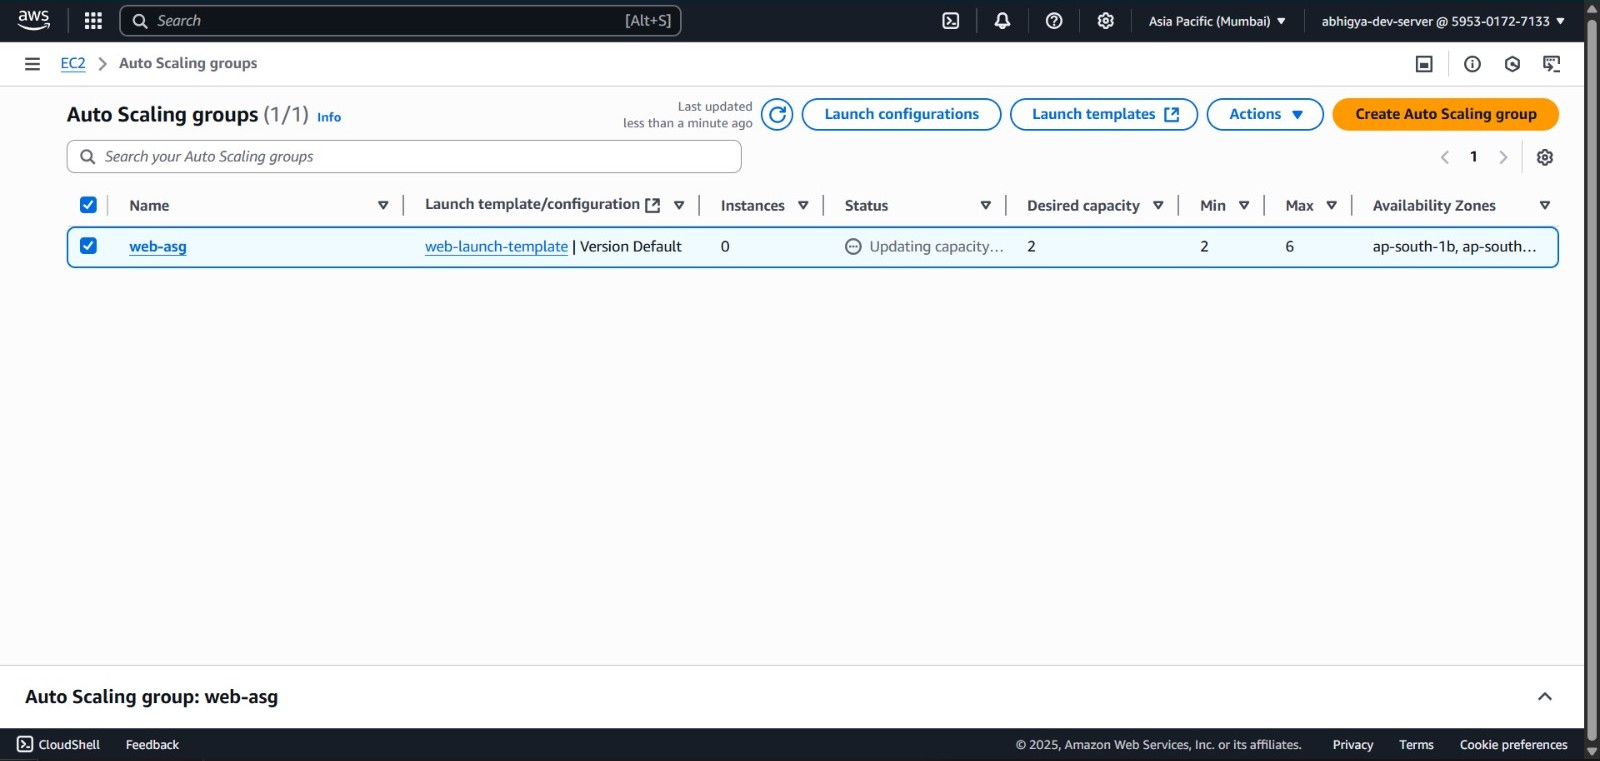
- In the EC2 dashboard, navigate to “Auto Scaling Groups” under “Auto Scaling” in the left menu
- Click “Create Auto Scaling group” button
- For Step 1 (Choose launch template or configuration):
- Enter
web-asgas the Auto Scaling group name - Select the
web-launch-templateyou just created - Ensure the default version is selected (or choose a specific version)
- Click “Next”
- Enter
- For Step 2 (Choose instance launch options):
- Select your VPC from the dropdown menu
- Under “Availability Zones and subnets”, select multiple subnets across different AZs
- Select at least two different Availability Zones for high availability
- Click “Next”
- For Step 3 (Configure advanced options):
- Under “Load balancing”, select “Attach to an existing load balancer”
- Choose “Choose from your load balancer target groups”
- Select the
web-target-groupyou created earlier - Under “Health checks”, leave the “EC2” health check enabled
- Enable “ELB” health checks by checking the box
- Leave “Health check grace period” as 300 seconds (this gives instances time to boot)
- Click “Next”
- For Step 4 (Configure group size and scaling policies):
- Set the following group sizes:
- Desired capacity: 2 instances
- Minimum capacity: 2 instances (ensures at least 2 are always running)
- Maximum capacity: 6 instances (allows scaling up to 6 under load)
- Under “Scaling policies”, select “Target tracking scaling policy”
- Enter a policy name like “CPU-Based-Scaling”
- Select “Average CPU utilization” as the metric type
- Set target value to 70% (will add instances when average CPU exceeds 70%)
- Set instance warmup to 300 seconds (time for new instances to be included in metrics)
- Click “Next”
- Set the following group sizes:
- For Step 5 (Add notifications - Optional):
- You can configure SNS notifications or skip this step
- Click “Next”
- For Step 6 (Add tags - Optional):
- Add a “Name” tag with value “ASG-Managed-Instance” to help identify these instances
- Click “Next”
- For Step 7 (Review):
- Review all settings
- Click “Create Auto Scaling group”
-
Verify ASG Configuration:
- After creating the ASG, navigate to the “Auto Scaling Groups” page
- Click on your newly created
web-asg - In the bottom pane, click the “Activity” tab to monitor launch progress
- You should see instances being launched (it may take 1-3 minutes)
- Check the “Instance management” tab to verify:
- Your desired capacity (2) matches the number of running instances
- The “Lifecycle” column shows “InService” for launched instances
- The “Health status” column shows “Healthy” for all instances
- Navigate to the “Target Groups” section and select your
web-target-group - Under the “Targets” tab, verify:
- The newly launched instances appear in the list
- Their health status shows as “healthy” (might take a few minutes)
- The “Status” column displays “registered” for all instances
- Test the setup by accessing your ALB DNS name in a browser again
- Refresh multiple times to ensure traffic is being directed to the ASG-managed instances
Task 4: Test Scaling Behavior
Steps:
-
Generate Load:
- Launch a separate EC2 instance to serve as your testing machine (or use an existing one)
- Connect to this instance via SSH:
# Replace with your key path and instance's public IP ssh -i "your-key.pem" ubuntu@test-instance-public-ip- Update package repositories and install testing tools:
# Update package lists and install Apache Bench (ab) and stress tool sudo apt update sudo apt install -y apache2-utils stress- Generate HTTP load using Apache Bench:
# This sends 10,000 requests with 100 concurrent connections # Replace with your actual ALB DNS name ab -n 10000 -c 100 http://your-alb-dns-name/- For more aggressive CPU stress testing (run in a separate terminal session):
# Stress all CPU cores at 100% for 5 minutes stress --cpu $(nproc) --timeout 300s -
Monitor Scaling Activities:
- Return to the AWS Management Console while your load test is running
- Navigate to EC2 > Auto Scaling Groups > select your
web-asg - Click on the “Activity” tab to observe launch activities in real-time:
- You should see “Starting a new instance” entries as the load increases
- Each entry will include a status message (e.g., “Successful”) and timestamp
- The “Cause” column explains why the instance was launched (e.g., “CPU utilization above target”)
- Click on the “Monitoring” tab to view real-time metrics:
- Locate the “CPU Utilization” graph and observe how it rises as load increases
- Track the “Group desired capacity” graph to see how ASG adjusts instance count
- For more detailed metrics, click the “CloudWatch” button in the “Monitoring” tab:
- This opens CloudWatch in a new tab with pre-filtered metrics for your ASG
- You can add graphs for CPU utilization, network traffic, and other metrics
- Try setting the time range to “1H” (last hour) for a clearer view of scaling events
- Return to EC2 > Instances to observe:
- New instances appearing with the “ASG-Managed-Instance” tag
- Instance states changing from “pending” to “running”
- The total count of running instances increasing based on load
-
Verify Application Availability:
- While the load testing and scaling activities are in progress, open a separate browser window
- Enter your ALB’s DNS name in the address bar (e.g.,
web-application-lb-1234567890.ap-south-1.elb.amazonaws.com) - Refresh the page multiple times (F5 or Ctrl+R) at different intervals
- Observe the following:
- The page should continue to load successfully without errors
- Response times should remain relatively stable
- The Instance ID shown on the page should change occasionally as requests are balanced across instances
- You may notice new instance IDs appearing as ASG launches additional instances
- Try this from different devices or networks if possible to simulate real user traffic
- Use browser developer tools (F12) to monitor network response times
- If using Chrome, you can open the Network tab and check the “Disable cache” option to ensure fresh requests
- Continue monitoring for at least 5-10 minutes to verify sustained availability
-
Observe Scale-In:
- After your load test has been running for a while (10-15 minutes), press Ctrl+C to terminate the load-generating tools
- In your SSH terminal, confirm all stress tests are stopped:
# Check if any stress processes are still running ps aux | grep stress # If needed, kill any remaining stress processes killall stress- Return to the AWS Management Console and navigate back to EC2 > Auto Scaling Groups > your
web-asg - Switch to the “Activity” tab and continue monitoring:
- Wait approximately 5-15 minutes (depending on your cooldown period)
- You should start seeing “Terminating EC2 instance” entries appear
- Each entry will include details about which instance is being terminated and why
- On the “Monitoring” tab, observe:
- The “CPU Utilization” graph should show a gradual decline
- The “Group desired capacity” graph should decrease in steps
- Eventually, your ASG should return to the minimum capacity (2 instances)
- On the “Instance management” tab, watch as:
- Instances status changes from “InService” to “Terminating” to being removed
- The termination happens gradually, not all at once (to prevent service disruption)
- Continue refreshing your website in the browser to confirm it remains available during scale-in
- This demonstrates the full auto-scaling lifecycle: scaling out under load and scaling in during quiet periods
What have we accomplished? We’ve built a rock-solid architecture that keeps your application humming along even when traffic suddenly spikes – like when that marketing campaign finally goes viral! And the best part? It optimizes costs by automatically scaling down during quieter periods. No more paying for idle servers at 3 AM!
Pro Tip: Always create your EC2 instances across multiple Availability Zones. Think of it as not keeping all your eggs in one basket. If one AZ has a hiccup (and yes, it happens!), your application keeps running smoothly from instances in other AZs. Your users won’t even notice the difference. Learn more about AWS high availability best practices.
Path-based Routing in AWS Application Load Balancer
What You’ll Learn
- Creating and configuring target groups for different applications
- Implementing path-based routing rules in an ALB
- Testing and verifying routing configuration
- Managing multiple services behind a single load balancer
Ever wondered how major websites serve different parts of their application from one domain? That’s where path-based
routing comes in! It’s
like having a smart traffic cop that directs visitors to different backend services based on the URL path they’re
requesting. Want to visit /api? You’ll be sent to the API servers. Looking for /blog? You’ll get routed to the blog
servers. This approach is incredibly handy when you’re running microservices
or need to manage multiple application components while presenting them to users under a single, clean URL.
graph TD
    User([User]) -->|Request| DNS[DNS: app.example.com]
    DNS -->|Routes to| ALB[Application Load Balancer]

    ALB -->|Path: /api/*| APIRule{API Route Rule}
    ALB -->|Path: /blog/*| BlogRule{Blog Route Rule}
    ALB -->|Path: /admin/*| AdminRule{Admin Route Rule}
    ALB -->|Path: /* default| DefaultRule{Default Rule}

    APIRule -->|Target Group 1| APIServers[API Servers]
    BlogRule -->|Target Group 2| BlogServers[Blog Servers]
    AdminRule -->|Target Group 3| AdminServers[Admin Dashboard]
    DefaultRule -->|Target Group 4| WebServers[Web Application]

    classDef user fill:#ECEFF1,stroke:#607D8B,color:black
    classDef alb fill:#FF9900,stroke:#E65100,color:white
    classDef rule fill:#42A5F5,stroke:#0D47A1,color:white
    classDef servers fill:#66BB6A,stroke:#2E7D32,color:white

        class User user
        class ALB,DNS alb
        class APIRule,BlogRule,AdminRule,DefaultRule rule
        class APIServers,BlogServers,AdminServers,WebServers servers
Key Concepts
| Concept | Description |
|---|---|
| Listener | Process that checks for connection requests using a specified protocol and port |
| Target Group | Group of resources (EC2 instances, containers, IP addresses) that receive traffic |
| Routing Rules | Conditions that determine how requests are forwarded to target groups |
| Path Pattern | URL pattern used to match and route requests to specific target groups |
| Rule Priority | Determines the order in which rules are evaluated (lowest number first) |
Task 1: Configure Load Balancer and Target Groups
Steps:
-
Create or Use Existing ALB:
- Log into the AWS Management Console at https://console.aws.amazon.com
- Navigate to the EC2 dashboard by clicking “Services” at the top, then selecting “EC2” under “Compute”
- In the left navigation menu, click on “Load Balancers” under the “Load Balancing” section
- Click the blue “Create load balancer” button at the top
- On the “Select load balancer type” page, choose “Application Load Balancer” and click “Create”
- For the basic configuration:
- Name: Enter
multi-app-albas your load balancer name - Scheme: Select “Internet-facing” to make it accessible from the internet
- IP address type: Choose “IPv4” (the default option)
- Name: Enter
- For Listeners:
- Confirm the default HTTP:80 listener is present (you can add HTTPS:443 if needed)
- For Availability Zones:
- Select your VPC from the dropdown
- Choose at least two availability zones and select their public subnets
- Selecting multiple AZs creates redundancy for high availability
- Click “Next: Configure Security Settings” (or skip if not using HTTPS)
- For Security groups:
- Either create a new security group or select an existing one
- Ensure it allows inbound HTTP (port 80) traffic from your desired sources (0.0.0.0/0 for public)
- Click “Next: Configure Routing” (but we’ll create target groups separately first)
- For now, just click through the remaining steps using any default target group
- You can complete the ALB creation process and update listeners afterward
-
Create First Target Group:
- Return to the EC2 dashboard in AWS Management Console
- In the left navigation pane, click on “Target Groups” under the “Load Balancing” section
- Click the “Create target group” button
- For the basic settings:
- Choose a target type: Select “Instances” (EC2 instances are the most common target)
- Target group name: Enter
app1-target-group - Protocol: Select “HTTP”
- Port: Enter “80”
- VPC: Select your VPC from the dropdown menu
- For the Health check settings:
- Protocol: Leave as HTTP
- Path: Enter
/app1/health(this is the endpoint that will be checked to determine if instances are healthy) - Advanced health check settings (optional):
- Port: Leave as “traffic port” (uses the same port as your target, 80)
- Healthy threshold: Set to 2 (number of consecutive successful checks to consider target healthy)
- Unhealthy threshold: Set to 2 (number of failed checks to consider target unhealthy)
- Timeout: Set to 5 seconds (time to wait for a response)
- Interval: Set to 30 seconds (time between health checks)
- Success codes: Leave as “200” (HTTP status code indicating success)
- Click “Next” to proceed to “Register targets”
- Under “Available instances”, select the EC2 instances that will serve App1
- Click “Include as pending below” to add them to the target group
- Review the selected instances in the “Review targets” section
- Click “Create target group” to finalize
-
Create Second Target Group:
- Repeat the process to create another target group
- For the basic settings:
- Choose a target type: Select “Instances”
- Target group name: Enter
app2-target-group - Protocol: Select “HTTP”
- Port: Enter “80”
- VPC: Select the same VPC you used for the first target group
- For the Health check settings:
- Protocol: Leave as HTTP
- Path: Enter
/app2/health(a different health check path for this application) - Keep the same advanced settings as the first target group, or adjust as needed
- Click “Next” to proceed to “Register targets”
- Select the EC2 instances that will serve App2 (these may be different from App1 instances)
- Complete the target group creation process
- Note: If using the same instances for both apps, make sure each instance has both /app1/health and /app2/health endpoints
Task 2: Configure Routing Rules
Steps:
-
Access Listener Rules:
- Return to the EC2 dashboard in the AWS Management Console
- Click on “Load Balancers” in the left navigation menu
- Select your newly created
multi-app-albfrom the list - In the bottom section, click on the “Listeners” tab to view all listeners
- Find the HTTP:80 listener in the list and click the “View/edit rules” link in the “Rules” column
- This will open the rules editor interface where you can manage path-based routing
-
Create Path-based Rules:
- In the rules editor, you’ll see a visual interface for managing rules
- By default, there’s a single default rule that forwards all traffic to the default target group
- To add your first rule, click the “+” icon (Insert Rule) in the appropriate position
-
For the first rule:
- Click “Add condition” and select “Path” from the dropdown
- For the path pattern, enter
/app1*or for more specificity/app1/* - Wildcards (*) match any characters, so this will route any URL starting with /app1
- Click “Add action” and select “Forward to target groups”
- Select your
app1-target-groupfrom the dropdown - Click the checkmark icon to save this rule
- To add the second rule, click the “+” icon again in the appropriate position
-
For the second rule:
- Click “Add condition” and select “Path” from the dropdown
- For the path pattern, enter
/app2*or for more specificity/app2/* - Click “Add action” and select “Forward to target groups”
- Select your
app2-target-groupfrom the dropdown - Click the checkmark icon to save this rule
-
For the default rule (which will match any requests that don’t match the above rules):
- You can either:
- Leave it pointing to your original target group
- Modify it to forward to a “default” target group if you’ve created one
- Change it to return a fixed response (e.g., a 404 Not Found status code)
- You can either:
-
Understanding Rule Priority Logic:
- Rules are evaluated in order of their priority number (lowest number = highest priority)
- When you added rules using the visual editor, they were automatically assigned priorities
- You can explicitly set rule priorities by clicking the edit icon next to the rule number
- Best practice is to leave gaps between priority numbers (e.g., 10, 20, 30) to make it easier to insert rules later
- Only the first matching rule is applied - subsequent matching rules are ignored
- To reorder rules, click “Reorder rules” and drag them to the desired positions
- Click “Update” to save your priority changes
- Adding Advanced Conditions (Optional):
- Path-based routing can be combined with other conditions for more complex routing rules:
- Host header: Route based on domain name (e.g., api.example.com vs. www.example.com)
- HTTP headers: Route based on specific header values
- Query strings: Route based on URL parameters
- Source IP: Route based on client IP address
- To create a combined rule:
- Click “+” to add a new rule
- Add multiple conditions (e.g., both Path and Host header)
- A request must match ALL conditions for the rule to apply
- Example: Route requests to /api/* but only from api.example.com domain
- Click the checkmark icon to save your advanced rule
- Path-based routing can be combined with other conditions for more complex routing rules:
-
Prepare and Test Applications:
-
Configure Your Backend Applications:
- SSH into each EC2 instance that will host both applications:
ssh -i "your-key.pem" ubuntu@instance-public-ip- Create directory structure for each application:
# Create directories for both applications sudo mkdir -p /var/www/html/app1 sudo mkdir -p /var/www/html/app2 # Set proper ownership sudo chown -R www-data:www-data /var/www/html/app1 sudo chown -R www-data:www-data /var/www/html/app2- Create the health check endpoint for App1:
sudo tee /var/www/html/app1/health > /dev/null << EOF <!DOCTYPE html> <html> <head> <title>App1 Health Check</title> </head> <body> <h1>App1 is healthy</h1> </body> </html> EOF- Create a sample App1 homepage:
sudo tee /var/www/html/app1/index.html > /dev/null << EOF <!DOCTYPE html> <html> <head> <title>Application 1</title> </head> <body> <div class="container"> <h1>Welcome to Application 1</h1> <p>This content is served by target group app1-target-group</p> <p>Server: $(hostname)</p> <p>Path: /app1/</p> </div> </body> </html> EOF- Create the health check endpoint for App2:
sudo tee /var/www/html/app2/health > /dev/null << EOF <!DOCTYPE html> <html> <head> <title>App2 Health Check</title> </head> <body> <h1>App2 is healthy</h1> </body> </html> EOF- Create a sample App2 homepage:
sudo tee /var/www/html/app2/index.html > /dev/null << EOF <!DOCTYPE html> <html> <head> <title>Application 2</title> </head> <body> <div class="container"> <h1>Welcome to Application 2</h1> <p>This content is served by target group app2-target-group</p> <p>Server: $(hostname)</p> <p>Path: /app2/</p> </div> </body> </html> EOF- Configure Nginx to handle path-based routing properly:
sudo tee /etc/nginx/sites-available/default > /dev/null << EOF server { listen 80 default_server; listen [::]:80 default_server; root /var/www/html; index index.html index.htm; # For root path location / { try_files \$uri \$uri/ =404; } # For App1 path location /app1/ { alias /var/www/html/app1/; try_files \$uri \$uri/ /app1/index.html; } # For App1 health check location = /app1/health { alias /var/www/html/app1/health; } # For App2 path location /app2/ { alias /var/www/html/app2/; try_files \$uri \$uri/ /app2/index.html; } # For App2 health check location = /app2/health { alias /var/www/html/app2/health; } } EOF- Test and reload Nginx configuration:
# Verify nginx configuration syntax sudo nginx -t # If the test passes, reload nginx to apply changes sudo systemctl reload nginx- Repeat these steps for all EC2 instances in your target groups
-
Test Direct Access to Applications:
- Before testing the load balancer routing, verify each application works directly:
- Try accessing the health check endpoint directly on each EC2 instance:
http://instance-public-ip/app1/healthhttp://instance-public-ip/app2/health
- Try accessing the application pages directly:
http://instance-public-ip/app1/http://instance-public-ip/app2/
- Verify that the correct content is served for each path on each instance
- If any issues occur, check the nginx error logs:
sudo tail -f /var/log/nginx/error.log -
Test Load Balancer Routing:
- Get your ALB’s DNS name from the EC2 console:
- EC2 > Load Balancers > select
multi-app-alb> Description tab - Look for the “DNS name” field (e.g.,
multi-app-alb-1234567890.us-east-1.elb.amazonaws.com)
- EC2 > Load Balancers > select
- Test accessing App1 through the load balancer:
- Open a web browser and navigate to
http://your-alb-dns-name/app1/ - You should see the App1 homepage content
- Refresh several times and verify the server hostname changes if you have multiple instances
- Open a web browser and navigate to
- Test accessing App2 through the load balancer:
- Navigate to
http://your-alb-dns-name/app2/ - You should see the App2 homepage content
- Again, refresh several times to verify load balancing is working
- Navigate to
- Test the default rule:
- Navigate to
http://your-alb-dns-name/or any other non-matching path - Verify it behaves as expected based on your default rule configuration
- Navigate to
- Get your ALB’s DNS name from the EC2 console:
-
Monitor Target Health:
- In the EC2 console, go to Target Groups
- Select
app1-target-groupand click the “Targets” tab - Verify all instances show “Healthy” status
- Repeat for
app2-target-group - If any targets show “Unhealthy” status:
- Check that the health check path exists (/app1/health or /app2/health)
- Verify nginx is properly configured and running
- Check security groups to ensure the ALB can reach your instances on port 80
- Review the target group settings to ensure the health check is configured correctly
- Test Fault Tolerance:
- To verify high availability:
- Stop one of the EC2 instances in your target group
- Observe in the target group that the instance transitions to “Unhealthy”
- Test accessing the application - requests should be routed only to healthy instances
- Restart the stopped instance
- Observe it returning to “Healthy” status and rejoining the rotation
- To verify high availability:
- To edit the default rule, click the edit (pencil) icon and make your desired changes
-
-
Set Rule Priority:
- In the rules editor, rules are evaluated in numeric order (lowest number first)
- You can reorder rules by dragging them up or down in the interface
- More specific rules (like exact path matches) should have higher priority than general rules
- To manually adjust priorities, click on the rule’s current priority number to edit it
- After arranging all rules, click “Update” at the bottom to save your changes
- Rules priority is crucial - if a request could match multiple rules, the one with highest priority (lowest number) will be applied
Task 3: Prepare and Test Applications
Steps:
-
Configure Application Servers:
- First, connect to your EC2 instance that will host App1:
# Connect to your EC2 instance via SSH # Replace with your key file and actual public IP address ssh -i "your-key.pem" ubuntu@ec2-instance-public-ip- Configure the first application (App1):
# Create the directory structure for App1 sudo mkdir -p /var/www/html/app1 sudo mkdir -p /var/www/html/app1/health # Create the main index.html file with a distinctive App1 theme sudo tee /var/www/html/app1/index.html > /dev/null << EOF <!DOCTYPE html> <html> <head> <title>App 1</title> </head> <body> <div class="container"> <h1>Application 1</h1> <div class="app-label">APP1</div> <p>This request was routed to App 1 based on the path.</p> <p>Server time: \$(date)</p> <p>Instance ID: \$(curl -s http://169.254.169.254/latest/meta-data/instance-id || echo "Unknown")</p> </div> </body> </html> EOF # Create a simple health check file that returns OK # The ALB will use this to confirm the application is running sudo tee /var/www/html/app1/health/index.html > /dev/null << EOF OK - App1 is healthy EOF # Set proper permissions sudo chown -R www-data:www-data /var/www/html/app1- Now configure the second application (App2) on the same or different instance:
# Create the directory structure for App2 sudo mkdir -p /var/www/html/app2 sudo mkdir -p /var/www/html/app2/health # Create the main index.html file with a distinctive App2 theme sudo tee /var/www/html/app2/index.html > /dev/null << EOF <!DOCTYPE html> <html> <head> <title>App 2</title> </head> <body> <div class="container"> <h1>Application 2</h1> <div class="app-label">APP2</div> <p>This request was routed to App 2 based on the path.</p> <p>Server time: \$(date)</p> <p>Instance ID: \$(curl -s http://169.254.169.254/latest/meta-data/instance-id || echo "Unknown")</p> </div> </body> </html> EOF # Create a simple health check file for App2 sudo tee /var/www/html/app2/health/index.html > /dev/null << EOF OK - App2 is healthy EOF # Set proper permissions sudo chown -R www-data:www-data /var/www/html/app2 # Restart the web server to apply changes sudo systemctl restart nginx || sudo systemctl restart apache2 -
Test Routing Configuration:
- After configuring both applications and ensuring the ALB is properly set up:
- Open your web browser and locate your ALB’s DNS name, which you can find:
- In the EC2 console under Load Balancers
- In the Description tab of your ALB’s details page
- It will look like
multi-app-alb-1234567890.ap-south-1.elb.amazonaws.com
- Test App1 routing:
- Enter the URL:
http://your-alb-dns-name/app1/(replacing “your-alb-dns-name” with your actual ALB DNS) - You should see the blue-themed App1 page with “Application 1” heading
- If you see a 404 error or wrong content, check:
- App1 directory exists at /var/www/html/app1/ on your server
- Your ALB rule for /app1/* is correctly configured
- The target group health check is passing
- Enter the URL:
- Test App2 routing:
- Enter the URL:
http://your-alb-dns-name/app2/ - You should see the red-themed App2 page with “Application 2” heading
- Different styling confirms you’re seeing different applications
- Enter the URL:
- Test the default rule:
- Try accessing the root URL:
http://your-alb-dns-name/ - The behavior depends on your default rule configuration:
- It might show a default app, a 404 error, or redirect
- Try accessing the root URL:
- Test an invalid path:
- Try
http://your-alb-dns-name/app3/ - This should follow your default rule’s behavior
- Try
-
Validate with Command Line:
- If you’re troubleshooting or need to automate testing, use the curl command:
# Check HTTP headers for App1 curl -I http://your-alb-dns-name/app1/ # Should show HTTP/1.1 200 OK if working properly # Check HTTP headers for App2 curl -I http://your-alb-dns-name/app2/ # View full content of App1 curl http://your-alb-dns-name/app1/ # View full content of App2 curl http://your-alb-dns-name/app2/ # Test edge cases curl -I http://your-alb-dns-name/ curl -I http://your-alb-dns-name/app1/subpath/ # Check health check endpoints (should return OK) curl http://your-alb-dns-name/app1/health/ curl http://your-alb-dns-name/app2/health/- To run a simple load test to verify ALB functionality:
 # Install Apache Bench if not already installed
 sudo apt update && sudo apt install -y apache2-utils

 # Send 100 requests with 10 concurrent connections
 ab -n 100 -c 10 http://your-alb-dns-name/app1/
 ab -n 100 -c 10 http://your-alb-dns-name/app2/
This path-based routing configuration allows you to host multiple applications or services under a single domain name, simplifying your architecture and reducing costs by sharing a single load balancer.
Pro Tip: If you’re setting this up for production (and I hope you are!), don’t skip on security. Take a few extra minutes to configure HTTPS listeners with SSL/TLS certificates from AWS Certificate Manager (they’re free!). While you’re at it, set up an HTTP to HTTPS redirect so your users are always on the secure version of your site. In today’s world, encryption isn’t optional – it’s essential.
Advanced AWS Networking and Services
What You’ll Learn
- Creating secure network architectures with public and private subnets
- Setting up secure access to private instances using a bastion host
- Implementing NAT Gateway for outbound internet access
- Configuring security groups for proper access control
Now we’re going to dive into the really good stuff – the advanced networking concepts that truly form the backbone of secure and scalable AWS infrastructures. If you’ve been following along, you’re about to level up your AWS skills with proper network segmentation and secure access patterns. These are the techniques that separate AWS hobbyists from true cloud architects!
Key Concepts
| Concept | Description |
|---|---|
| VPC (Virtual Private Cloud) | Your own isolated section of the AWS cloud |
| Subnets | Segments of your VPC’s IP address range with different accessibility levels |
| NAT Gateway | Allows instances in private subnets to access the internet while preventing inbound access |
| Internet Gateway | Enables communication between your VPC and the internet |
| Route Tables | Control the traffic flow within your VPC and to external networks |
| Security Groups | Virtual firewalls that control inbound and outbound traffic at the instance level |
| Bastion Host | A secure instance that serves as a gateway for accessing private resources |
Task 1: Create VPC and Subnet Architecture
graph TD
    subgraph "secure-vpc (10.0.0.0/16)"
        subgraph "Public Subnet (10.0.1.0/24)"
            BH[Bastion Host]
            IGW[Internet Gateway]
            NAT[NAT Gateway]
        end

        subgraph "Private Subnet (10.0.2.0/24)"
            APP[Application Servers]
            DB[Database Servers]
        end

        IGW <-->|Public Traffic| Internet((Internet))
        BH -->|SSH Access| APP
        APP -->|Outbound Traffic| NAT
        NAT -->|Route| IGW
        APP <-->|Internal Traffic| DB
    end

    Admin([Admin User]) -->|SSH| BH

    classDef public fill:#81D4FA,stroke:#0277BD,color:black;
    classDef private fill:#FFE0B2,stroke:#E65100,color:black;
    classDef external fill:#ECEFF1,stroke:#607D8B,color:black;

    class BH,IGW,NAT public;
    class APP,DB private;
    class Internet,Admin external;
Steps:
-
Create VPC:
- Sign in to the AWS Management Console at https://console.aws.amazon.com
- In the search bar at the top, type “VPC” and select the “VPC” service from the dropdown
- In the left navigation panel, click on “Your VPCs” under “Virtual private cloud”
- Click the orange “Create VPC” button in the top-right corner
- For VPC settings, select “VPC only” (not VPC and more)
- Enter a name tag:
secure-vpc(this helps identify your VPC in the AWS console) - Enter the IPv4 CIDR block:
10.0.0.0/16(this provides up to 65,536 IP addresses) - Leave the IPv6 CIDR block as “No IPv6 CIDR block” unless specifically needed
- Keep the Tenancy as “Default” (dedicated tenancy costs significantly more)
- Click “Create VPC” at the bottom of the page
- You’ll see a success message when complete - click “Close” to continue
- Verify your VPC appears in the VPC list with the correct CIDR block and name
-
Create Subnets:
- In the left navigation panel of the VPC Dashboard, click on “Subnets”
- Click the orange “Create subnet” button in the top-right corner
- For VPC ID, select the
secure-vpcyou just created from the dropdown - Under “Subnet settings”, you’ll create your first subnet:
- Subnet name: Enter
public-subnet-1 - Availability Zone: Select the first AZ in the list (e.g., ap-south-1a if in Mumbai region)
- IPv4 CIDR block: Enter
10.0.1.0/24(this provides 256 IP addresses)
- Subnet name: Enter
- Click “Add new subnet” to add another subnet to this creation process
- Enter details for your second subnet:
- Subnet name: Enter
private-subnet-1 - Availability Zone: Select the same AZ as the public subnet for simplicity (e.g., ap-south-1a)
- IPv4 CIDR block: Enter
10.0.2.0/24(this provides another 256 IP addresses)
- Subnet name: Enter
- Click “Create subnet” at the bottom of the page
- Verify both subnets appear in the subnet list with correct settings
- Important: By default, new subnets do not automatically assign public IP addresses to instances
- For the public subnet, enable auto-assign public IP:
- Select
public-subnet-1from the list - Click “Actions” button and select “Edit subnet settings”
- Check the box for “Enable auto-assign public IPv4 address”
- Click “Save”
- Select
-
Create Internet Gateway:
- In the left navigation panel of the VPC Dashboard, click on “Internet Gateways”
- Click the “Create internet gateway” button
- Enter a name tag:
secure-vpc-igw - Click “Create internet gateway”
- After creation, you’ll see a message that the Internet Gateway is detached
- Click the “Actions” button and select “Attach to VPC”
- Select your
secure-vpcfrom the dropdown - Click “Attach internet gateway”
- Verify the State changes to “Attached” in the Internet Gateway list
-
Create NAT Gateway:
- In the left navigation panel of the VPC Dashboard, click on “NAT Gateways”
- Click the “Create NAT gateway” button
- Configure the following settings:
- Name: Enter
secure-vpc-nat - Subnet: Select
public-subnet-1from the dropdown (NAT gateway must be in a public subnet) - Connectivity type: Select “Public” (allows instances in private subnets to access the internet)
- Elastic IP allocation ID: Click “Allocate Elastic IP” button (this creates a new static IP)
- You’ll see a new Elastic IP has been allocated
- Name: Enter
- Click “Create NAT gateway”
- Note: NAT Gateways incur charges by the hour plus data processing fees
- The status will initially show “Pending” - it takes about 5 minutes to become “Available”
- Wait until the NAT Gateway status changes to “Available” before proceeding
Task 2: Configure Routing
Steps:
-
Create and Configure Public Route Table:
- In the left navigation panel of the VPC Dashboard, click on “Route Tables”
- Click the “Create route table” button
- Configure the following settings:
- Name tag: Enter
public-route-table - VPC: Select
secure-vpcfrom the dropdown
- Name tag: Enter
- Click “Create route table”
- After creation, select the newly created
public-route-tablefrom the list - At the bottom of the page, click on the “Routes” tab
- Click “Edit routes” button
- You’ll see the local route is already created (10.0.0.0/16 pointing to local)
- Click “Add route” to add a new route
- Enter the following settings:
- Destination: Enter
0.0.0.0/0(this represents all internet traffic) - Target: Select “Internet Gateway” and choose
secure-vpc-igwfrom the dropdown
- Destination: Enter
- Click “Save changes”
- Now, click on the “Subnet associations” tab
- Click “Edit subnet associations” button
- Check the box next to
public-subnet-1to associate it with this route table - Click “Save associations”
- This association means that traffic from instances in the public subnet will use this route table
- Verify the subnet is now listed under “Explicit subnet associations”
-
Create and Configure Private Route Table:
- Click “Route Tables” in the left navigation panel again
- Click the “Create route table” button
- Configure the following settings:
- Name tag: Enter
private-route-table - VPC: Select
secure-vpcfrom the dropdown
- Name tag: Enter
- Click “Create route table”
- After creation, select the newly created
private-route-tablefrom the list - At the bottom of the page, click on the “Routes” tab
- Click “Edit routes” button
- Click “Add route” button
- Enter the following settings:
- Destination: Enter
0.0.0.0/0(this represents all internet traffic) - Target: Select “NAT Gateway” and choose the NAT Gateway you created earlier (
secure-vpc-nat)
- Destination: Enter
- Click “Save changes”
- Now, click on the “Subnet associations” tab
- Click “Edit subnet associations” button
- Check the box next to
private-subnet-1to associate it with this route table - Click “Save associations”
- This association allows instances in the private subnet to access the internet through the NAT Gateway while remaining private
-
Verify the subnet is now listed under “Explicit subnet associations”
- To confirm your route tables are set up correctly, check that:
- The
public-route-tablehas a local route (10.0.0.0/16) and an internet gateway route (0.0.0.0/0) - The
private-route-tablehas a local route (10.0.0.0/16) and a NAT gateway route (0.0.0.0/0) - Each route table is associated with the correct subnet
- The
Task 3: Launch and Configure EC2 Instances
Steps:
-
Launch Bastion Host:
- In your AWS Management Console, navigate to the EC2 service (search “EC2” in the search bar)
- In the EC2 Dashboard, click on “Instances” in the left navigation pane
- Click the orange “Launch instances” button to begin the instance creation process
- Instance Configuration - Name and tags:
- Enter
bastion-hostin the “Name” field - Optionally add additional tags like Environment=Dev, Role=Bastion for better organization
- Enter
- Application and OS Images (Amazon Machine Image):
- In the “Quick Start” tab, select “Ubuntu”
- From the Ubuntu AMI list, select “Ubuntu Server 22.04 LTS (HVM), SSD Volume Type”
- Verify the architecture shows as “64-bit (x86)”
- Instance type:
- Select “t2.micro” from the list (this is free tier eligible)
- You can use the search box to filter for “t2.micro” if needed
- Key pair (login):
- If you have an existing key pair you want to use, select it from the dropdown
- If you need a new key pair, click “Create new key pair”
- Enter a name like
vpc-key-pair - Keep Key pair type as “RSA”
- Keep Private key file format as “.pem” (or select “.ppk” if using PuTTY on Windows)
- Click “Create key pair”
- Important: The private key file (.pem) will automatically download - store it securely as you cannot download it again
- Enter a name like
- Network settings:
- Click “Edit” to expand the network settings section
- VPC: Select
secure-vpcfrom the dropdown - Subnet: Select
public-subnet-1from the dropdown (this is your public subnet) - Auto-assign public IP: Select “Enable” to ensure the instance gets a public IP
- Firewall (security groups): Select “Create security group”
- Security group name: Enter
bastion-sg - Description: Enter “Security group for bastion host”
- For the security rule:
- Keep Type as “SSH”
- Source type: Select “My IP” (this automatically adds your current IP address)
- Description: Enter “SSH access from my IP only”
- Configure storage:
- Keep the default storage settings (8 GB gp2 volume)
- Advanced details:
- No changes needed for basic setup
- Summary:
- Review all your settings
- Click “Launch instance” in the right panel
- You’ll see a success message with your instance ID
- Click “View all instances” to return to the instances page
- Wait for the “Instance state” to change to “Running” and “Status check” to show “2/2 checks passed”
- Make note of the public IP address displayed in the instance details
-
Launch Private Instance:
- From the EC2 Dashboard, click “Launch instances” again
- Instance Configuration - Name and tags:
- Enter
private-instancein the “Name” field
- Enter
- Application and OS Images:
- Select the same Ubuntu Server 22.04 LTS image as before
- Instance type:
- Select “t2.micro” again
- Key pair:
- Very important: Select the SAME key pair that you used for the bastion host
- This allows you to use the same private key when accessing through the bastion
- Network settings:
- Click “Edit” to expand the network settings section
- VPC: Select
secure-vpcfrom the dropdown - Subnet: Select
private-subnet-1from the dropdown (this is your private subnet) - Auto-assign public IP: Select “Disable” (private instances shouldn’t have public IPs)
- Firewall (security groups): Select “Create security group”
- Security group name: Enter
private-instance-sg - Description: Enter “Security group for private instance”
- For the security rule:
- Keep Type as “SSH”
- Source type: Select “Custom”
- For Source, we need to reference the bastion’s security group:
- Click in the Source field and wait for the dropdown to appear
- Select the
bastion-sgsecurity group from the list
- Description: Enter “SSH access from bastion host only”
- Configure storage:
- Keep the default storage settings (8 GB gp2 volume)
- Advanced details:
- No changes needed for basic setup
- Summary:
- Review all your settings
- Click “Launch instance” in the right panel
- Wait for the instance to reach “Running” state and pass its status checks
- Make note of the private IP address displayed in the instance details (will look like 10.0.2.X)
- Notice that this instance only has a private IP address and no public IP
Task 4: Test Secure Connectivity
Steps:
-
Transfer SSH Key to Bastion:
- Open your terminal (Command Prompt, PowerShell, Terminal, etc.) on your local computer
- Navigate to the directory where your key pair file (.pem) is stored
- Run the following command to copy your key pair to the bastion host:
# Replace with your actual key filename and bastion's public IP # For example: scp -i vpc-key-pair.pem vpc-key-pair.pem [email protected]:~/ scp -i your-key.pem your-key.pem ubuntu@bastion-public-ip:~/- If you get a warning about the host authenticity, type “yes” to continue
- You should see output indicating the transfer progress and completion
- Note: On Windows, you might need to adjust file permissions first if using PowerShell:
# For Windows PowerShell users only icacls.exe "your-key.pem" /inheritance:r /grant:r "$($env:USERNAME):(R)" -
Connect to Bastion Host:
- In your terminal, connect to the bastion host using SSH:
# Replace with your actual key filename and bastion's public IP # For example: ssh -i vpc-key-pair.pem [email protected] ssh -i your-key.pem ubuntu@bastion-public-ip- If successful, you’ll see a welcome message and a Ubuntu command prompt
- You are now logged into the bastion host in the public subnet
-
Set Proper Permissions on Key File in Bastion Host:
- While logged into the bastion host, run the following command to secure your key file:
# Change permissions to make the private key secure # Without this step, SSH will refuse to use the key file due to insecure permissions chmod 400 ~/your-key.pem- The command restricts permissions so only you (the owner) can read the file
- This is a security requirement for SSH private keys
-
Connect to Private Instance from Bastion:
- Now you’ll use the bastion host as a jump server to connect to your private instance
- While still logged into the bastion host, run:
# Replace with your private instance's private IP (should start with 10.0.2.X) # For example: ssh -i ~/vpc-key-pair.pem [email protected] ssh -i ~/your-key.pem ubuntu@private-instance-private-ip- If successful, you’ll see a new welcome message and command prompt
- You are now logged into the private instance that doesn’t have direct internet access
- To confirm you’re on the private instance, you can check its private IP:
hostname -I- The IP should match the private IP you noted earlier
-
Verify Internet Access through NAT Gateway:
- While logged into the private instance, test outbound internet connectivity:
# This sends 4 ping packets to Google's DNS server ping -c 4 8.8.8.8 # Try accessing Google by domain name ping -c 4 google.com-
You should see successful ping responses, indicating that:
- The private instance can access the internet (outbound)
- DNS resolution is working properly
- The NAT Gateway is correctly routing traffic
-
Also test downloading a file to verify HTTP traffic:
# Try downloading a file from the internet wget -q --spider http://example.com echo $? # Should return 0 if successful- A return value of 0 confirms successful HTTP connectivity
-
Verify Security Configuration:
- Try to access the private instance directly from your local machine (this should fail):
# Open a new terminal window on your local machine # Try to SSH directly to the private instance using its private IP ssh -i your-key.pem ubuntu@private-instance-private-ip-
This connection attempt should time out, confirming that:
- The private instance is not directly accessible from the internet
- You must go through the bastion host for access
- Your security architecture is working as designed
-
Return to your bastion connection and exit both SSH sessions:
 # Exit from the private instance
 exit

 # Exit from the bastion host
 exit
This secure network architecture you’ve created demonstrates the “defense in depth” principle. The bastion host acts as a secure entry point, while private instances remain protected from direct internet access. Meanwhile, the NAT Gateway enables those private instances to still access external resources when needed.
This secure network architecture forms the foundation for hosting applications that require different levels of security and internet accessibility, while maintaining the ability to manage all resources.
Pro Tip: Use AWS Systems Manager Session Manager as an alternative to bastion hosts for connecting to private instances without the need to manage SSH keys or open inbound SSH ports in your security groups.
End-to-End Domain Configuration
- Registering and configuring a domain name in Route 53
- Setting up DNS records to route traffic to your AWS resources in the ap-south-1 region
- Implementing HTTPS with AWS Certificate Manager
- Creating custom domain endpoints for multi-port applications
This section guides you through the complete process of configuring a custom domain for your AWS applications, from registration to secure certificate implementation.
graph TD
    User([Internet User]) -->|"1. DNS Query
example.com"| DNS[DNS Resolvers]
    DNS -->|"2. Get NS Records"| Root[Root DNS Servers]
    Root -->|"3. NS Records"| DNS
    DNS -->|"4. Query NS Server"| R53[Route 53 Name Servers]

    subgraph "AWS Cloud"
        R53 -->|"5. A/ALIAS Record"| DNS

        subgraph "Domain Configuration"
            HZ[Hosted Zone
example.com]
            Records["DNS Records:
- A record (www → IP)
- ALIAS (apex → ALB)
- MX (mail servers)
- TXT (verification)"]
            Cert[SSL/TLS Certificate
ACM]
        end

        ALB[Application Load Balancer] -->|Handle HTTPS| Web[Web Servers]
        API[API Gateway] --> Lambda[Lambda Functions]
        CF[CloudFront] --> S3[S3 Static Content]
    end

    DNS -->|"6. Response with IP"| User
    User -->|"7. HTTPS Request"| ALB
    User -->|"7. HTTPS Request"| API
    User -->|"7. HTTPS Request"| CF

    HZ --- Records
    Records --> ALB
    Records --> API
    Records --> CF
    Cert --> ALB
    Cert --> API
    Cert --> CF

    classDef external fill:#ECEFF1,stroke:#607D8B,color:black;
    classDef route53 fill:#8ED1FC,stroke:#0693E3,color:black;
    classDef dns fill:#ABE9CD,stroke:#00D084,color:black;
    classDef endpoints fill:#FF9900,stroke:#E65100,color:white;
    classDef backends fill:#F78DA7,stroke:#CF2E2E,color:white;

    class User,DNS,Root external;
    class R53,HZ,Records route53;
    class Cert dns;
    class ALB,API,CF endpoints;
    class Web,Lambda,S3 backends;
Key Concepts
| Concept | Description |
|---|---|
| Record Sets | DNS records including A, CNAME, MX, TXT, etc. |
| AWS Certificate Manager (ACM) | Service for provisioning and managing SSL/TLS certificates |
| Alias Record | Special Route 53 record that routes traffic to AWS resources |
| Health Check | Route 53 feature to monitor endpoint health and route traffic accordingly |
Task 1: Register and Configure a Domain
Steps:
-
Register a Domain with Route 53:
- Sign in to the AWS Management Console and navigate to Route 53 service
- In the Route 53 dashboard, click on “Domains” in the left navigation panel
- Click on “Registered domains” and then click the “Register Domain” button
- In the domain registration page:
- Enter your desired domain name in the search box (e.g., yourdomain.com)
- Select the domain extension you want (.com, .net, .org, etc.)
- Click “Check” to verify availability
- If your desired domain is available, click “Add to cart”
- If it’s not available, you’ll see alternative suggestions - select one or try a different name
- Review the selected domain and pricing information
- Click “Continue” to proceed
- Complete the contact information form:
- Enter accurate contact details (first name, last name, organization, address, etc.)
- This information becomes publicly available in the WHOIS database unless you add privacy protection
- Select “Yes” for “Privacy Protection” (usually included free with AWS domains)
- Review the Terms and Conditions, check the agreement box
- Click “Continue” to proceed to payment
- Review your order details and cost (domains typically range from $9-$15 per year)
- Click “Complete Order” to finalize your purchase
- You’ll see a confirmation page with your order details
- Important: Domain registration typically takes 24-48 hours to complete
- You’ll receive an email confirmation when your domain is successfully registered
- You can check the status anytime on the “Registered domains” page in Route 53
-
Create a Hosted Zone:
- After your domain registration is complete (or if using an external registrar):
- In the Route 53 dashboard, click on “Hosted zones” in the left navigation panel
- Click the “Create hosted zone” button
- Enter your domain name (e.g., yourdomain.com) in the “Domain name” field
- Add a description (optional but recommended) like “Main hosting zone for yourdomain.com”
- For “Type”, select “Public hosted zone” (this makes your DNS records accessible from the internet)
- You can leave the Tags section empty or add tags if you have an organizational tagging strategy
- Click “Create hosted zone” button at the bottom
- After creation, you’ll see the zone details page with automatically created NS (Name Server) and SOA records
- The NS record contains four name servers that AWS has assigned to your domain
-
Configure Name Servers:
- If you registered your domain with Route 53, the name servers are automatically configured
- If you’re using an external domain registrar (like GoDaddy, Namecheap, etc.), you need to update their name
servers:
- In the Route 53 console, click on your newly created hosted zone
- Look for the “NS” (Name Server) record in the records list
- Note down all four name server addresses (they look like ns-1234.awsdns-56.org)
- Log in to your external domain registrar’s website
- Navigate to the domain management or DNS settings section
- Find the option to edit name servers or DNS settings
- Replace the current name servers with the four Route 53 name servers you noted
- Save your changes
- Important: DNS propagation can take up to 48 hours, though it often completes within a few hours
- You can verify propagation using online DNS lookup tools by checking if the name servers have been updated
- During propagation, DNS resolution may be inconsistent as global DNS servers update their records
Task 2: Create SSL/TLS Certificate
Steps:
-
Request Certificate:
- Sign in to the AWS Management Console and ensure you’re in the ap-south-1 region
- Check the region in the top-right corner of the console
- If needed, click on the region name and select “Asia Pacific (Mumbai) ap-south-1” from the dropdown
- Important: Certificates used with CloudFront must be in us-east-1 region, but for ALB in ap-south-1, request the certificate in that region
- Search for “Certificate Manager” in the search bar and select the ACM service
- In the AWS Certificate Manager dashboard, click the “Request a certificate” button
- On the “Request a certificate” page, select “Request a public certificate” and click “Next”
- In the “Domain names” section:
- In the first field, enter your domain name (e.g.,
yourdomain.com) - Click “Add another name to this certificate”
- In the second field, enter a wildcard domain (e.g.,
*.yourdomain.com) - This wildcard covers all subdomains (www, api, mail, etc.)
- In the first field, enter your domain name (e.g.,
- Under “Validation method”, select “DNS validation”
- DNS validation is recommended as it allows automatic renewal
- Email validation requires manual action every renewal period
- Under “Key algorithm”, leave the default “RSA 2048” unless you have specific requirements
- Add tags if desired (optional)
- Click “Request” to submit your certificate request
- You’ll be redirected to the certificates list where your new certificate will show “Pending validation” status
- Sign in to the AWS Management Console and ensure you’re in the ap-south-1 region
-
Validate Certificate:
- On the certificates page, click on your pending certificate to view its details
- In the certificate details page, you’ll see a “Domains” section listing both your domain entries
- Next to each domain name, you’ll see “Create records in Route 53” buttons
- For each domain in the list:
- Click the “Create records in Route 53” button
- A dialog will appear showing the CNAME record that will be created
- Click “Create records” to automatically add the validation records to your Route 53 hosted zone
- Repeat for each domain name listed
- You’ll see success messages confirming the creation of each record
- After creating the validation records:
- Certificate validation typically takes 5-30 minutes to complete
- You don’t need to take any further action during validation
- You can monitor the certificate status on the ACM console
- Refresh the page periodically to check progress
- Wait for the certificate status to change from “Pending validation” to “Issued”
- Once the status changes to “Issued”, your certificate is ready to use
- Important certificate details to note:
- The certificate ARN (Amazon Resource Name) - you’ll need this when configuring HTTPS for your load balancer
- The expiration date - AWS will automatically renew the certificate if the DNS validation records remain in place
- The “Domain” section showing all secured domains
- AWS ACM certificates are valid for 13 months and auto-renew as long as the DNS validation records exist
Task 3: Set Up DNS Records for Your Resources
Steps:
-
Create Record for Web Application ALB:
- Sign in to the AWS Management Console and navigate to the Route 53 service
- In the Route 53 dashboard, click on “Hosted zones” in the left navigation panel
- Click on your domain name from the list of hosted zones
- On your domain’s hosted zone page, click the “Create record” button
- For the basic record configuration:
- In the “Record name” field:
- For a subdomain, enter
www(this will create www.yourdomain.com) - For the apex/root domain, leave this field empty (this will create yourdomain.com)
- For a subdomain, enter
- Record type: Select “A - Routes traffic to an IPv4 address and some AWS resources”
- In the “Record name” field:
- In the “Route traffic to” section:
- Choose “Alias to Application and Classic Load Balancer”
- Select your region from the dropdown (e.g., ap-south-1)
- In the load balancer dropdown, select your ALB (e.g., web-application-lb)
- The dropdown will show the full DNS name of your ALB
- Note: The dropdown only appears if your ALB is in the same region you’re currently working in
- For “Routing policy” select “Simple routing” (routes traffic to a single resource)
- Leave “Evaluate target health” checked (this ensures DNS failover if your ALB becomes unhealthy)
- Set TTL (Time To Live) to “60 seconds” (this controls how long DNS resolvers cache this record)
- Click “Create records” to save your changes
- You’ll see a success message and the record will appear in your hosted zone’s record list
- The record will be available almost immediately but may take up to the TTL value to propagate globally
-
Create Record for API Endpoint:
- While still in your domain’s hosted zone, click the “Create record” button again
- For the basic record configuration:
- Record name: Enter
api(this will create api.yourdomain.com) - Record type: Select “A - Routes traffic to an IPv4 address and some AWS resources”
- Record name: Enter
- In the “Route traffic to” section:
- Select “Alias”
- From the endpoint type dropdown, select the appropriate service:
- For API Gateway: Select “Alias to API Gateway API”
- For a separate ALB: Select “Alias to Application and Classic Load Balancer”
- For an EC2 instance with Elastic IP: Select “Alias to Elastic IP address”
- Select your region from the dropdown
- Select the specific resource from the dropdown that appears
- If using API Gateway, ensure you’ve deployed the API to a stage first
- If using a separate ALB for your API, select that load balancer
- Keep routing policy as “Simple routing”
- Keep “Evaluate target health” checked
- Click “Create records” to save your changes
- Verify the record appears in your hosted zone’s record list
- Note down the full domain (api.yourdomain.com) for use in your applications or documentation
-
Set Up Email Records (Optional):
- While still in your domain’s hosted zone, click the “Create record” button again
- For MX (Mail Exchanger) records:
- Record name: Leave empty (for domain-wide email)
- Record type: Select “MX - Routes to mail servers”
- Set a TTL value (usually 3600 seconds/1 hour is appropriate)
- Value/Route traffic to: Enter your mail server information with priority values
- For example, if using Google Workspace (formerly G Suite):
1 ASPMX.L.GOOGLE.COM.5 ALT1.ASPMX.L.GOOGLE.COM.5 ALT2.ASPMX.L.GOOGLE.COM.10 ALT3.ASPMX.L.GOOGLE.COM.10 ALT4.ASPMX.L.GOOGLE.COM.- Note the periods at the end of each domain and the priority numbers at the beginning
- Click “Create records”
- For SPF records (to prevent email spoofing):
- Click “Create record” again
- Record name: Leave empty (for domain-wide policy)
- Record type: Select “TXT - Contains text information”
- TTL: 3600 seconds (1 hour)
- Value: Enter your SPF record, for example:
"v=spf1 include:_spf.google.com ~all"(for Google Workspace)
- Click “Create records”
- For DKIM records (if your email provider gave you DKIM keys):
- Click “Create record”
- Record name: Enter the selector provided by your email service (e.g.,
google._domainkey) - Record type: Select “TXT”
- TTL: 3600 seconds
- Value: Enter the DKIM key provided by your email service (in quotes)
- Click “Create records”
- For DMARC record:
- Click “Create record”
- Record name: Enter
_dmarc - Record type: Select “TXT”
- TTL: 3600 seconds
- Value: Enter your DMARC policy, for example:
"v=DMARC1; p=none; rua=mailto:[email protected]"
- Click “Create records”
- Verify all records appear correctly in your hosted zone
- Test email setup using online email verification tools
Task 4: Configure HTTPS for Your Application
Steps:
-
Update Load Balancer:
- Sign in to the AWS Management Console and navigate to the EC2 service
- In the left navigation panel, under “Load Balancing”, click on “Load Balancers”
- Select your Application Load Balancer from the list (e.g., web-application-lb)
- In the bottom section of the page, click on the “Listeners” tab
- Click the “Add listener” button to create a new HTTPS listener
- Configure the new listener:
- Protocol: Select “HTTPS”
- Port: Enter “443” (standard HTTPS port)
- Under “Default actions”:
- Action type: Select “Forward to target groups”
- Target group: Select your web application target group from the dropdown
- Under “Secure listener settings”:
- Security policy: Select the latest policy available (e.g., “ELBSecurityPolicy-2016-08” or newer)
- The security policy controls the SSL/TLS protocols and ciphers allowed
- For “Default SSL/TLS certificate”:
- Select “From ACM (recommended)”
- Choose your domain’s certificate from the dropdown (the one you created and validated earlier)
- If you don’t see your certificate, verify it’s in the same region as your ALB and fully validated
- Click “Add” to create the HTTPS listener
- The listener creation process takes a few seconds to complete
- When finished, you should see both HTTP (port 80) and HTTPS (port 443) listeners in the list
-
Redirect HTTP to HTTPS:
- In the same Listeners tab, find the HTTP:80 listener in the list
- Click the “Edit” button or select “Edit” from the “Actions” dropdown
- Under “Actions”, click on the existing Forward action and click “Remove” to delete it
- Click “Add action”, then select “Redirect” from the dropdown
- Configure the redirect:
- Protocol: Select “HTTPS” from the dropdown (this changes HTTP to HTTPS)
- Port: Enter “443” (standard HTTPS port)
- Path: Leave as “#{path}” (this maintains the same URL path structure)
- Query: Leave as “#{query}” (this maintains any query parameters)
- Status code: Select “HTTP_301 (Permanent Redirect)”
- 301 is best for production as browsers will cache the redirect
- 302 can be used for testing as browsers don’t cache it
- Click “Update” to save the changes
- This configuration now redirects all HTTP traffic to the secure HTTPS version automatically
-
Test Configuration:
- Open a new terminal window on your computer to test the setup
- Test the HTTP to HTTPS redirect using curl (or any web browser):
# Replace yourdomain.com with your actual domain curl -I http://www.yourdomain.com- You should see a response with “HTTP/1.1 301 Moved Permanently” and a “Location” header pointing to the HTTPS version
- Test the HTTPS connection:
# This tests if the HTTPS site is properly serving content with a valid certificate curl -I https://www.yourdomain.com- You should see “HTTP/1.1 200 OK” indicating successful connection
- If using curl on Windows, you might need to add the
-kflag if certificate validation fails - Test the API endpoint if you set one up:
curl -I https://api.yourdomain.com- This should also return a successful response
- You can also test in any web browser by visiting:
- http://www.yourdomain.com (should automatically redirect to HTTPS)
- https://www.yourdomain.com (should load directly with a secure padlock icon)
- https://api.yourdomain.com (if you set up an API endpoint)
- In the browser, click the padlock icon to verify the certificate details
-
Configure Security Groups:
- Navigate back to the EC2 dashboard
- In the left navigation panel, under “Network & Security”, click on “Security Groups”
- Find and select the security group associated with your ALB
- Click on the “Inbound rules” tab
- Click “Edit inbound rules”
- If there isn’t already a rule for HTTPS, click “Add rule”
- Configure the new rule:
- Type: Select “HTTPS” from the dropdown (this automatically sets port 443)
- Source: Select “Anywhere-IPv4” (0.0.0.0/0) to allow public access
- Alternatively, restrict to specific IP ranges if you have a limited audience
- Description: Add “Allow HTTPS traffic from the internet”
- Click “Save rules” to apply the changes
- The security group update applies immediately
- Your load balancer can now accept both HTTP and HTTPS traffic, with HTTP automatically redirecting to HTTPS
-
Verify End-to-End Encryption:
- Open your browser and visit your website with HTTPS (https://www.yourdomain.com)
- Check for the padlock icon in the address bar
- Click on the padlock to view certificate details
- Verify that:
- The certificate is valid and trusted
- The certificate covers both your domain and wildcard (if configured)
- The connection is using a modern TLS version (TLS 1.2 or 1.3)
- The certificate is issued by Amazon (via the CA you selected during creation)
- Use online SSL testing tools (like Qualys SSL Labs) for a comprehensive security assessment:
- Visit https://www.ssllabs.com/ssltest/
- Enter your domain and run a test
- Aim for at least an “A” rating
- Address any warnings or recommendations in the report
These steps establish a secure, professional web presence that automatically directs all visitors to the encrypted version of your website, protecting their data during transit and building trust with your users.
With this end-to-end domain configuration, your AWS applications now have a professional, secure, and branded web presence that inspires trust in your users.
Pro Tip: Use Route 53 health checks with DNS failover to automatically route traffic away from unhealthy endpoints. This creates a self-healing architecture that improves your application’s availability without manual intervention.
Cross-Account VPC Peering
- Creating and accepting VPC peering connections between AWS accounts
- Configuring routes and security groups for cross-account access
- Testing and validating inter-VPC communication
Cross-account VPC peering allows you to connect VPCs across different AWS accounts, enabling secure, private communication between resources without traversing the public internet.
graph TB
    subgraph "AWS Account A"
        VPC_A["VPC-A (10.0.0.0/16)"]
        subgraph "VPC-A Resources"
            EC2_A[EC2 Instances]
            RDS_A[(RDS Database)]
        end
        RT_A[Route Table A]
    end

    subgraph "AWS Account B"
        VPC_B["VPC-B (172.16.0.0/16)"]
        subgraph "VPC-B Resources"
            EC2_B[EC2 Instances]
            Lambda_B[Lambda Function]
        end
        RT_B[Route Table B]
    end

    VPC_A <---->|"VPC Peering Connection"| VPC_B

    EC2_A --- VPC_A
    RDS_A --- VPC_A
    VPC_A --- RT_A

    EC2_B --- VPC_B
    Lambda_B --- VPC_B
    VPC_B --- RT_B

    RT_A -.-|"Route: 172.16.0.0/16 → Peering"| VPC_A
    RT_B -.-|"Route: 10.0.0.0/16 → Peering"| VPC_B

    classDef accountA fill:#BBDEFB,stroke:#1976D2,color:black;
    classDef accountB fill:#FFECB3,stroke:#FFA000,color:black;
    classDef resources fill:#E8F5E9,stroke:#388E3C,color:black;
    classDef peering fill:#E0E0E0,stroke:#616161,color:black;

    class VPC_A,RT_A accountA;
    class VPC_B,RT_B accountB;
    class EC2_A,RDS_A,EC2_B,Lambda_B resources;
Key Concepts
| Concept | Description |
|---|---|
| Route Tables | Control traffic flow between peered VPCs |
| Security Groups | Control instance-level access across peered VPCs |
| Transitive Peering | Not supported in AWS - peering relationships are one-to-one only |
| Role Assumption | AWS IAM mechanism for cross-account authorization |
Task 1: Prepare VPCs in Both Accounts
Steps:
-
Account A: Configure VPC:
- Sign in to the AWS Management Console for Account A (note the account ID for later use)
- Navigate to the VPC Dashboard by searching for “VPC” in the search bar
- First, verify if you have an existing VPC to use, or create a new one:
- To check existing VPCs: Click on “Your VPCs” in the left navigation panel
- Look for a VPC with adequate resources and note its VPC ID (e.g., vpc-0123456789abcdef0)
- If creating a new VPC: Click “Create VPC” button
- For a new VPC, configure the following settings:
- Resources to create: Select “VPC only”
- Name tag: Enter a descriptive name like
AccountA-VPC - IPv4 CIDR block: Enter
10.0.0.0/16(this provides 65,536 IP addresses) - Leave other settings at their defaults and click “Create VPC”
- After confirming your VPC, check its configuration:
- Verify the CIDR block is
10.0.0.0/16 - Make note of the VPC ID for later use in the peering connection
- Ensure you have subnets properly configured within this VPC:
- Navigate to “Subnets” in the left navigation panel
- Filter by your VPC ID to see associated subnets
- You should have at least one subnet with resources you want to share
- Note the subnet CIDR blocks (e.g., 10.0.1.0/24, 10.0.2.0/24)
- Verify the CIDR block is
- Verify that resources you want to share are in this VPC:
- Navigate to EC2 Dashboard > Instances
- Check that target instances are in this VPC and in the correct subnets
- Note the private IP addresses of resources that Account B will need to access
- Document all of this information for reference during the peering process
-
Account B: Configure VPC:
- Sign out of Account A and sign in to the AWS Management Console for Account B
- Note the Account B account ID (12-digit number) for the peering request
- Navigate to the VPC Dashboard by searching for “VPC” in the search bar
- Verify existing VPC or create a new one with a non-overlapping CIDR:
- Check existing VPCs under “Your VPCs” in the left navigation panel
- If using existing VPC, confirm its CIDR block DOES NOT overlap with Account A’s 10.0.0.0/16
- If creating new, click “Create VPC” button
- For a new VPC, configure these settings:
- Resources to create: Select “VPC only”
- Name tag: Enter a descriptive name like
AccountB-VPC - IPv4 CIDR block: Enter
172.16.0.0/16(a different range than Account A) - Leave other settings at defaults and click “Create VPC”
- After creation, check the VPC configuration:
- Verify the CIDR block is
172.16.0.0/16 - Make note of the VPC ID for the peering connection
- Ensure you have subnets properly configured:
- Navigate to “Subnets” in the left navigation panel
- Filter by your VPC ID to see associated subnets
- Verify subnet CIDR blocks (e.g., 172.16.1.0/24, 172.16.2.0/24)
- Verify the CIDR block is
- Verify that the resources needing access to Account A are in this VPC:
- Navigate to EC2 Dashboard > Instances
- Confirm instances are in this VPC and in the appropriate subnets
- Note the private IP addresses of instances that will be accessing Account A resources
-
Verify CIDR Compatibility:
- Create a simple diagram or table documenting the CIDR ranges for both VPCs and their subnets
-
Example verification table:
Account A VPC: 10.0.0.0/16 - Subnet 1: 10.0.1.0/24 - Subnet 2: 10.0.2.0/24 Account B VPC: 172.16.0.0/16 - Subnet 1: 172.16.1.0/24 - Subnet 2: 172.16.2.0/24 - Confirm that no CIDR blocks overlap by checking the network ranges:
- 10.0.0.0/16 covers IP addresses 10.0.0.0 through 10.0.255.255
- 172.16.0.0/16 covers IP addresses 172.16.0.0 through 172.16.255.255
- These ranges are completely separate, confirming they don’t overlap
- If you found any overlap, you must reconfigure one of the VPCs or use different VPCs altogether
- Remember: The entire VPC peering configuration will fail if there’s any IP address range overlap
- Additionally, check that DNS resolution settings match your requirements in both VPCs:
- In the VPC Dashboard, select your VPC, click “Actions”, then “Edit VPC settings”
- Ensure “Enable DNS hostnames” and “Enable DNS resolution” are configured similarly in both VPCs
Task 2: Create the VPC Peering Connection
Steps:
-
Initiate Peering Request from Account A:
- Sign in to the AWS Management Console for Account A (the requester account)
- Navigate to the VPC Dashboard by searching for “VPC” in the AWS search bar
- In the left navigation panel, click on “Peering Connections” under “Virtual Private Cloud”
- Click the blue “Create Peering Connection” button in the top-right corner
- In the “Create Peering Connection” form, enter the following details:
- Peering connection name tag: Enter
AccountA-to-AccountB-Peering- Use a descriptive name that identifies both accounts for easy reference
- VPC (Requester): From the dropdown, select your VPC in Account A (the VPC ID you noted earlier)
- Verify the CIDR block shown matches what you expect (e.g., 10.0.0.0/16)
- Under “Select another VPC to peer with”, select the “Another account” option
- Account ID: Enter Account B’s exact 12-digit AWS account ID (e.g., 123456789012)
- Double-check this number as any error will cause the peering request to fail
- Region: If Account B’s VPC is in the same AWS region, keep the default “This region (ap-south-1)”
- If Account B’s VPC is in a different region, select “Another region” and choose the correct region
- Note: Cross-region peering has additional considerations for routing and security
- VPC (Accepter): Enter the exact VPC ID from Account B that you noted earlier
- This must be entered exactly, as you cannot browse VPCs in another account
- Format should be vpc-xxxxxxxxxxxxxxxxx (vpc- followed by 17 hexadecimal characters)
- Peering connection name tag: Enter
- Review all entered information carefully
- Click “Create Peering Connection” button at the bottom of the form
- You’ll see a confirmation dialog - click “OK”
- The new peering connection will appear in your list with status “Pending acceptance”
- The peering connection request is now waiting for Account B to accept it
- Make note of the Peering Connection ID (pcx-xxxxxxxxxxxxxxxxx) for tracking purposes
- Important: The peering request will expire after 7 days if not accepted
-
Accept Peering Request in Account B:
- Sign out of Account A and sign in to the AWS Management Console for Account B (the accepter account)
- Navigate to the VPC Dashboard by searching for “VPC” in the AWS search bar
- In the left navigation panel, click on “Peering Connections” under “Virtual Private Cloud”
- You should see the pending peering request from Account A in the list
- The Status will show “Pending acceptance” and the Requester VPC Owner will show Account A’s account ID
- Select the pending connection by clicking its checkbox
- From the “Actions” dropdown menu at the top, select “Accept request”
- Review the confirmation dialog that appears:
- Verify the Requester VPC details (Account A’s VPC)
- Verify the Accepter VPC details (your VPC in Account B)
- Confirm that the CIDR blocks don’t overlap
- Click “Accept request” to confirm
- The status should change from “Pending acceptance” to “Active”
- If the status doesn’t change to “Active” or if there’s an error:
- Check for overlapping CIDR blocks between the two VPCs
- Verify that you have the necessary permissions in Account B
- Ensure you selected the correct peering connection request
- Once active, make note of the Peering Connection ID (same as seen in Account A)
- Important: The peering connection is now established, but traffic will not flow until you configure routes
Task 3: Configure Routing
Steps:
-
Update Route Tables in Account A:
- While still signed in to Account A’s AWS Management Console
- Navigate to the VPC Dashboard by searching for “VPC” in the search bar
- In the left navigation panel, click on “Route Tables” under “Virtual Private Cloud”
- You need to identify which route tables control traffic for the subnets that need to communicate with Account B:
- Look through your route tables and note their associations
- Use the “Subnet Associations” tab at the bottom to see which subnets use each route table
- If you have resources in multiple subnets that need access to Account B, you’ll need to update multiple route tables
- For each relevant route table:
- Select the route table by clicking its checkbox
- Click on the “Routes” tab in the lower panel
- Click the “Edit routes” button
- In the edit screen, click “Add route” to create a new routing rule
- Enter the following details for the new route:
- Destination: Enter Account B’s full VPC CIDR block (
172.16.0.0/16)- You must enter the exact CIDR range you documented earlier
- If Account B has multiple non-contiguous CIDR blocks, you’ll need a separate route for each
- Target: Select “Peering Connection” from the dropdown
- After selecting, a second dropdown will appear with available peering connections
- Select the VPC peering connection you created (
pcx-xxxxxxxxxxxxxxxxx) - Verify the correct peering connection ID is selected
- Destination: Enter Account B’s full VPC CIDR block (
- Review the new route entry for accuracy
- Click “Save changes” to apply the new route
- The route table will now forward traffic destined for Account B’s VPC through the peering connection
- Verify the route is correctly displayed in the route table with:
- Destination showing Account B’s CIDR block
- Target showing the peering connection ID
- State showing “Active”
- Repeat for any additional route tables as needed
- Important: Any subnet whose route table doesn’t have this route entry won’t be able to access Account B’s VPC
-
Update Route Tables in Account B:
- Sign out of Account A and sign in to Account B’s AWS Management Console
- Navigate to the VPC Dashboard by searching for “VPC” in the search bar
- In the left navigation panel, click on “Route Tables” under “Virtual Private Cloud”
- Similar to Account A, identify which route tables control traffic for subnets that need to communicate with
Account A:
- Check the “Subnet Associations” tab to identify which route tables serve which subnets
- Determine which subnets contain resources that need to access Account A’s resources
- For each relevant route table:
- Select the route table by clicking its checkbox
- Click on the “Routes” tab in the lower panel
- Click the “Edit routes” button
- Click “Add route” to create a new routing rule
- Enter the following details for the new route:
- Destination: Enter Account A’s full VPC CIDR block (
10.0.0.0/16)- You must enter the exact CIDR range documented earlier
- If Account A uses multiple non-contiguous CIDR blocks, add a route for each
- Target: Select “Peering Connection” from the dropdown
- Select the same VPC peering connection ID (
pcx-xxxxxxxxxxxxxxxxx) - The same peering connection is used in both directions
- Select the same VPC peering connection ID (
- Destination: Enter Account A’s full VPC CIDR block (
- Review the new route entry for accuracy
- Click “Save changes” to apply the new route
- Verify the route has been added correctly:
- Destination shows Account A’s CIDR block
- Target shows the peering connection ID
- State shows “Active”
-
Repeat for any additional route tables as needed
- Important routing considerations:
- Traffic between the peered VPCs will only flow for the subnets whose route tables have been updated
- The routing is not transitive - if Account A peers with Account B and Account B peers with Account C, traffic cannot flow between Account A and Account C through these peerings
- For multi-region peering, be aware of potential cross-region data transfer costs
Task 4: Configure Security Groups
Steps:
-
Update Security Group in Account A:
- While still signed in to Account A’s AWS Management Console
- Navigate to the EC2 Dashboard by searching for “EC2” in the search bar
- In the left navigation panel, under “Network & Security”, click on “Security Groups”
- Identify the security groups associated with resources that need to be accessed from Account B:
- Look through the list of security groups
- Use the “Description” and “Name” columns to identify the correct security groups
- If needed, click on each security group to see which instances use it
- You can also check EC2 instances directly to see which security groups are attached
- For each relevant security group:
- Select the security group by clicking its checkbox
- Click on the “Inbound rules” tab in the lower panel
- Click the “Edit inbound rules” button
- Click “Add rule” to create a new inbound rule
- Configure the rule to allow the specific traffic needed:
- Type: Select the required protocol from the dropdown (e.g., SSH, HTTP, HTTPS, PostgreSQL)
- If using a custom protocol, select “Custom TCP” or “Custom UDP” and specify the port
- Protocol and Port range will automatically fill based on the Type selected
- Source: Select “Custom” and enter Account B’s entire VPC CIDR block (
172.16.0.0/16)- For more granular control, you can specify just the subnet CIDR instead of the whole VPC
- For even more security, you can reference a specific security group from Account B (not covered here)
- Description: Enter a clear description like “Allow SSH from Account B VPC”
- Review all fields for accuracy
- Click “Save rules” to apply the changes
- Verify the rule appears correctly in the inbound rules list
- Repeat for any other security groups protecting resources that Account B needs to access
- Important: Security groups are stateful, so return traffic is automatically allowed
-
Update Security Group in Account B:
- Sign out of Account A and sign in to Account B’s AWS Management Console
- Navigate to the EC2 Dashboard by searching for “EC2” in the search bar
- In the left navigation panel, under “Network & Security”, click on “Security Groups”
- Identify the security groups associated with resources that need to access Account A or be accessed from Account
A:
- Look through the security groups list
- Use filters if needed to narrow down the list
- For each instance that will interact with Account A, note its security group
- For each relevant security group:
- Select the security group by clicking its checkbox
- Click on the “Inbound rules” tab in the lower panel
- Click the “Edit inbound rules” button
- Click “Add rule” to create a new inbound rule
- Configure the rule with these settings:
- Type: Select the required protocol (e.g., SSH, HTTP, HTTPS, MySQL)
- Protocol and Port range will fill automatically based on the selected Type
- Source: Select “Custom” and enter Account A’s entire VPC CIDR (
10.0.0.0/16) - Description: Enter a clear description like “Allow HTTP from Account A VPC”
- Click “Save rules” to apply the changes
- Verify the rule appears correctly in the inbound rules list
- Also check if you need to add outbound rules:
- While security groups are stateful (return traffic is automatically allowed)
- If you have restrictive outbound rules, you may need to add rules to allow outbound traffic to Account A
- To do this, click the “Outbound rules” tab and add rules with Account A’s CIDR as the destination
- Security group changes take effect immediately - no reboot needed
Task 5: Test Cross-Account Communication
Steps:
-
Launch Test Instances if Needed:
- If you don’t already have suitable instances for testing in both VPCs, create them:
- In Account A:
- Navigate to EC2 Dashboard > Instances > Launch instances
- Choose Amazon Linux 2 or Ubuntu Server (free tier eligible)
- Select t2.micro instance type
- Configure instance details:
- Network: Select your Account A VPC
- Subnet: Select a subnet with the updated route table
- Auto-assign Public IP: Enable (for easy access)
- Add storage: Keep default 8 GB
- Add tags: Name = “AccountA-Test-Instance”
- Security group: Select the security group you updated in Task 4
- Launch with an appropriate key pair
- In Account B:
- Follow the same process in Account B
- Make sure to place the instance in your Account B VPC and in a subnet with the updated route table
- Name it “AccountB-Test-Instance”
- For both instances:
- Wait for them to reach the “Running” state and pass status checks
- Note their private IP addresses (Account A’s will be 10.0.x.x, Account B’s will be 172.16.x.x)
- Also note their public IPs (for initial access)
-
Test Connectivity from Account A to B:
- Connect to your test instance in Account A’s VPC:
# Connect to Account A's test instance ssh -i your-key.pem ec2-user@public-ip-of-account-a-instance- Once connected, test basic connectivity to Account B’s instance using ping:
# Replace 172.16.x.x with the actual private IP of Account B's instance ping -c 4 172.16.x.x- If ping is successful, you’ll see responses with round-trip times
- If ping is blocked (common in cloud environments), try a TCP connection like SSH:
# You may need to copy your key to the test instance first # Replace 172.16.x.x with the actual private IP of Account B's instance ssh -i your-key.pem [email protected]- If successful, you’ll connect directly to the instance in Account B using its private IP
- If it fails, troubleshoot by checking:
- Security groups (ensure Account B allows SSH from Account A’s CIDR)
- Route tables (ensure the routes to the peering connection exist)
- Instance status (ensure the target instance is running)
-
Test Connectivity from Account B to A:
- Connect to your test instance in Account B’s VPC:
# Connect to Account B's test instance ssh -i your-key.pem ec2-user@public-ip-of-account-b-instance- Once connected, test connectivity to Account A’s instance:
# Replace 10.0.x.x with the actual private IP of Account A's instance ping -c 4 10.0.x.x- Try SSH or other required protocols:
# Replace 10.0.x.x with the actual private IP of Account A's instance ssh -i your-key.pem [email protected]- As before, if this fails, verify security groups, routes, and instance status
- The bi-directional test ensures traffic can flow both ways through the peering connection
-
Verify Application Connectivity:
- Beyond basic connectivity, test the specific applications or services that need cross-account communication
- Examples of application testing:
- For web servers:
# Test HTTP connectivity curl http://private-ip-of-target-instance -
For database servers:
# For MySQL mysql -h private-ip-of-db-instance -u username -p # For PostgreSQL psql -h private-ip-of-db-instance -U username -d dbname - For custom applications, run your application-specific tests
- For web servers:
- Document successful connections and any services that work properly
- For any failures, review security groups to ensure the specific ports are allowed
- Remember that DNS resolution across VPC peering may require additional configuration:
- To enable DNS resolution, edit the peering connection settings in both accounts
- In VPC Dashboard > Peering Connections > select your peering connection
- Click “Actions” > “Edit DNS settings” > Enable DNS resolution
-
Monitor and Troubleshoot:
- If you’re having connectivity issues, examine VPC flow logs (if enabled) to see if packets are being dropped
- Check Network ACLs if you’re using them in addition to security groups
- Verify that the routing is correct in both direction by running
traceroutetests - Use AWS Systems Manager Session Manager to access instances without public IPs for testing
Cross-account VPC peering enables you to create advanced multi-account architectures for improved security, organizational boundaries, and specialized workload isolation while maintaining secure private connectivity.
Pro Tip: Document your cross-account networking carefully. Create a CIDR allocation plan to avoid overlapping IP ranges as you scale your multi-account strategy. Consider using AWS Transit Gateway for more complex architectures with multiple interconnected VPCs across accounts.
EBS Snapshots and AMIs
- Automating snapshot lifecycle with policies
- Building custom AMIs from existing instances
- Sharing and copying AMIs across regions and accounts
- Using AMIs for consistent and rapid deployments
This section covers essential techniques for data persistence and system replication in AWS, focusing on EBS snapshots for data backup and AMIs for system image management.
Key Concepts
| Concept | Description |
|---|---|
| Incremental Backup | Only blocks changed since last snapshot are saved, improving efficiency |
| Lifecycle Policy | Automated management of snapshots creation and deletion |
| Golden AMI | Fully configured AMI that meets organizational standards and security requirements |
Task 1: Create and Manage EBS Snapshots
Steps:
-
Create a Manual EBS Snapshot:
- Sign in to the AWS Management Console and navigate to the EC2 service
- In the left navigation panel, under “Elastic Block Store”, click on “Volumes”
- In the volumes list, identify the volume you want to back up:
- Check the “Volume ID” column (e.g., vol-0123456789abcdef0)
- Look for volumes attached to your important instances
- The “Attachment information” column shows which instance the volume is attached to
- The “Size” column shows the volume size
- Select the target volume by clicking its checkbox
- From the “Actions” dropdown menu, select “Create snapshot”
- In the “Create snapshot” dialog:
- Enter a descriptive name in the “Name” field (e.g., “database-volume-backup”)
- Enter a detailed description in the “Description” field (e.g., “Manual backup of PostgreSQL database volume - May 25, 2025”)
- Add tags to help organize and locate your snapshot:
- Click “Add tag” button
- Key: “Name”, Value: “database-backup-may2025”
- Add additional tags like:
- Key: “Environment”, Value: “Production”
- Key: “Purpose”, Value: “Database backup”
- Review your settings for accuracy
- Click “Create snapshot” to begin the snapshot process
- You’ll be returned to the volumes page with a confirmation message
- Click on “Snapshots” in the left navigation panel to view your snapshot
- The new snapshot will appear with status “pending” until the process completes
- This may take several minutes to hours depending on the volume size
- A snapshot captures the data at the point in time it was initiated
- When status changes to “completed”, your snapshot is ready
- Note: Even during creation, the snapshot is usable (AWS completes the transfer in the background)
-
Create Snapshot Lifecycle Policy:
- In the EC2 dashboard, under “Elastic Block Store”, click on “Lifecycle Manager”
- Click the “Create snapshot lifecycle policy” button
- For “Policy type”, select “EBS snapshot policy”
- In the “Description” field, enter a meaningful name like “Daily-Production-Backups”
- Under “Resource type”, select “Volume”
- For “Target volumes with these tags”:
- Click “Add tag” button
- Key: “Backup”, Value: “Daily”
- This means only volumes with this tag will be backed up by this policy
- Under “IAM role”, leave as “Default role” (EC2 will create or use the appropriate role)
- In the “Policy schedule” section:
- Click “Create schedule” button
- Schedule name: Enter “Daily-backup”
- Frequency: Select “Daily”
- Every: Leave as “1” day(s)
- Starting at: Set to “03:00” UTC (off-peak hours)
- Retention type: Select “Count”
- Retain: Enter “7” (keeps the last 7 daily snapshots)
- Copy tags from source: Check this box (preserves volume tags on snapshots)
- Under “Tagging”, add a tag:
- Key: “LifecyclePolicy”, Value: “Daily”
- Click “Create policy” at the bottom of the page
- The new policy will appear in the lifecycle policies list with status “enabled”
- Important: For this policy to work, make sure to add the tag “Backup: Daily” to any volumes you want automatically backed up
- To add tags to volumes:
- Go to EC2 > Volumes > select volume > Actions > Manage tags
- Add the tag with key “Backup” and value “Daily”
-
Monitor and Restore Snapshots:
- To monitor snapshots:
- In the EC2 dashboard, click on “Snapshots” under “Elastic Block Store”
- View all your snapshots, their status, creation time, and size
- Use the search bar to filter by tag, volume ID, or snapshot ID
- To verify lifecycle policy is working, check for new snapshots each day
- To restore a snapshot to a new volume:
- Select the snapshot you want to restore by clicking its checkbox
- From the “Actions” dropdown, select “Create volume from snapshot”
- In the “Create volume” dialog:
- Verify the snapshot ID matches your selected snapshot
- Volume Type: Choose the appropriate type for your needs
- gp3: General purpose SSD (recommended for most workloads)
- io1/io2: Provisioned IOPS SSD (for high-performance needs)
- st1: Throughput optimized HDD (for high-throughput workloads)
- sc1: Cold HDD (for infrequently accessed data)
- Size (GiB): Defaults to snapshot size, but can be increased (not decreased)
- IOPS: Configure if using io1/io2 or gp3 volumes
- Throughput: Configure if using gp3 volumes
- Availability Zone: Select the AZ where you want the new volume
- Important: Must match the AZ of the instance you plan to attach it to
- Encryption: Leave default (encrypts if your default is encryption enabled)
- Tags: Add appropriate tags to identify this as a restored volume
- Click “Create volume” button
- You’ll be redirected to the volumes page
- The new volume will show status “creating” until ready
- To attach the restored volume to an instance:
- Once the volume status is “available”, select it by clicking its checkbox
- From the “Actions” dropdown, select “Attach volume”
- In the “Attach volume” dialog:
- Instance: Select the target EC2 instance from the dropdown
- Device name: Leave the default (/dev/sdf) or choose another available device name
- Click “Attach” button
- The volume will now show as “in-use” and list the instance ID
- To access the restored volume on your instance:
- Connect to your EC2 instance via SSH
- Use the
lsblkcommand to identify the attached volume:lsblk -
Mount the volume to access its data:
# Create mount point sudo mkdir -p /mnt/restored-volume # For a new volume with no file system: sudo mkfs -t ext4 /dev/nvme1n1 # Use the device name from lsblk # Mount the volume sudo mount /dev/nvme1n1 /mnt/restored-volume # Access your data cd /mnt/restored-volume - For volumes with existing file systems, skip the mkfs step and just mount
- To monitor snapshots:
Task 2: Create and Use AMIs
Steps:
-
Prepare an Instance for AMI Creation:
- Connect to the instance you want to use as the base for your AMI via SSH:
# Replace key.pem with your actual key file name # Replace instance-public-ip with your instance's actual public IP ssh -i key.pem ubuntu@instance-public-ip- Once connected, update all software packages to ensure your AMI has the latest updates:
# Update package lists and upgrade all packages sudo apt update sudo apt upgrade -y # For Amazon Linux 2, use: # sudo yum update -y- Install any additional software packages that should be included in your AMI:
# Example: Install a web server sudo apt install -y nginx # Example: Install a database server sudo apt install -y postgresql # Configure services to start on boot sudo systemctl enable nginx sudo systemctl enable postgresql- Clean up the instance to remove temporary files and logs that shouldn’t be in your image:
# Remove temporary files sudo rm -rf /tmp/* # Clean package manager cache to reduce image size sudo apt clean # For Amazon Linux 2: sudo yum clean all # Remove cloud-init logs (these will be regenerated on new instances) sudo rm -rf /var/log/cloud-init*.log # Remove SSH host keys (new ones will be generated on first boot) sudo rm -f /etc/ssh/ssh_host_* # Clear bash history for the current user cat /dev/null > ~/.bash_history && history -c # Clear machine-specific identifiers if any custom applications use them # For instance, removing any application UUID files: # sudo rm -f /opt/myapp/instance-id.txt- Confirm services are running as expected:
# Check service status systemctl status nginx # Verify application configurations nginx -t- Log out of the instance after completing all preparations:
# Exit the SSH session exit -
Create a Custom AMI:
- Sign in to the AWS Management Console and navigate to the EC2 service
- In the left navigation panel, click on “Instances”
- Find and select the instance you just prepared by clicking its checkbox
- From the “Actions” dropdown menu, navigate to “Image and templates” > “Create image”
- In the “Create image” dialog, fill out the following fields:
- Image name: Enter
web-server-base-v1(use a clear, versioned naming convention) - Image description: Enter a detailed description such as “Base web server image with Nginx, PostgreSQL, and security hardening - May 2025”
- Tags: Add tags to help organize your AMIs:
- Key: “Name”, Value: “web-server-base-v1”
- Key: “Environment”, Value: “Production”
- Key: “Creator”, Value: “YourName”
- Under “Instance volumes”, you can modify the root volume:
- To change the size, edit the “Size (GiB)” field
- To change the volume type, select a different option from the “Volume Type” dropdown
- For most AMIs, the default settings are appropriate
- Check “Delete on termination” for volumes that should be deleted when instances launched from this AMI are terminated
- For advanced settings:
- No reboot: Leave UNCHECKED for most cases (this ensures a clean, consistent state)
- Note: Leaving it unchecked means your instance will briefly restart
- If you check this box, data might not be in a consistent state in your AMI
- Leave other advanced settings at their defaults unless you have specific requirements
- No reboot: Leave UNCHECKED for most cases (this ensures a clean, consistent state)
- Image name: Enter
- Review all settings to ensure accuracy
- Click “Create image” button to start the AMI creation process
- You’ll see a confirmation message with your new AMI ID (ami-xxxxxxxxxxxxxxxxx)
- AMI creation typically takes 5-20 minutes depending on volume size
- During this time, your instance will reboot if you left “No reboot” unchecked
-
Monitor AMI Creation Progress:
- In the EC2 dashboard, click on “AMIs” under “Images” in the left navigation panel
- Find your new AMI in the list by its name or ID
- The “Status” column will show “pending” while the AMI is being created
- Wait for the status to change to “available” before using the AMI
- You can click the refresh button periodically to update the status
- While waiting, you can review the AMI details:
- Click on the AMI ID to see its details
- Note the Platform, Root Device Type, Virtualization type, and other properties
-
Launch Instance from AMI:
- Once the AMI status shows “available”, select it by clicking its checkbox
- From the “Actions” dropdown menu, select “Launch instance from AMI”
- In the launch instance wizard:
- Enter a descriptive name for your new instance (e.g., “web-server-from-custom-ami”)
- The AMI section will already be filled with your selected AMI
- For Instance type, select the appropriate size based on your needs (e.g., t2.micro for testing)
- For Key pair, select an existing key pair or create a new one
- Under Network settings:
- Select your VPC and subnet
- Configure security groups to allow necessary traffic (HTTP, HTTPS, SSH)
- Configure storage:
- The root volume will use the settings from your AMI
- Add additional volumes if needed
- Advanced details:
- Configure any user data scripts if you need additional customization at launch
- Set IAM roles if the instance needs specific AWS permissions
- In the Summary panel, review all settings
- Click “Launch instance” to create your new instance
- You’ll be redirected to a success page with your new instance ID
- Click “View all instances” to see your instance in the instances list
- The new instance will initialize using all the configurations and software from your AMI
- Wait for the status checks to pass (usually 2-3 minutes)
-
Verify the New Instance:
- Once the instance is running and status checks have passed, connect to it:
ssh -i key.pem ubuntu@new-instance-public-ip- Verify that all software and configurations from your AMI are present:
# Check installed packages dpkg -l | grep nginx dpkg -l | grep postgresql # Verify services are running systemctl status nginx systemctl status postgresql # Check configurations ls -la /etc/nginx/sites-enabled/- Test any applications or services that should be running
- Your instance should be ready to use with all the customizations from your AMI
-
Share AMI Across Accounts:
- In the EC2 dashboard, click on “AMIs” under “Images” in the left navigation panel
- Find and select your AMI by clicking its checkbox
- From the “Actions” dropdown menu, select “Edit AMI permissions”
- In the “Edit AMI permissions” dialog:
- Under “Shared accounts”, click “Add account ID”
- Enter the exact 12-digit AWS account ID of the account you want to share with
- For example: 123456789012
- Double-check this number for accuracy - typos will prevent sharing
- You can add multiple account IDs by clicking “Add account ID” again
- Important: Don’t select “Make public” unless you intentionally want to share your AMI with everyone (rarely recommended)
- If you need to add Organization ID or Organizational Unit ID:
- Click “Add organization/organizational unit ID”
- Enter your Organization ID (o-xxxxxxxxxx) or OU ID (ou-xxxx-xxxxxxxx)
- Under “AMI visibility settings”:
- Private: Only you and accounts you specify can launch instances
- Public: Anyone can launch instances from this AMI (avoid this for most cases)
- Click “Update AMI permissions” to save changes
- The permissions update takes effect immediately
- The shared account can now:
- See your AMI when they filter AMIs by “Private images” in their EC2 console
- Launch instances using your AMI
- However, they cannot modify, copy, or re-share your AMI without permission
- Important: If your AMI uses encrypted snapshots with a customer managed key, you must also share the KMS key:
- Navigate to the AWS KMS console
- Find your key and edit its key policy to include the other account’s permissions
Task 3: Copy AMI to Another Region
Steps:
-
Copy AMI:
- In the EC2 dashboard, click on “AMIs” under “Images” in the left navigation panel
- Find and select your AMI by clicking its checkbox
- From the “Actions” dropdown menu, select “Copy AMI”
- In the “Copy AMI” dialog:
- Destination region: Select your target region from the dropdown menu
- For example: “Asia Pacific (Tokyo) ap-northeast-1” or “Asia Pacific (Singapore) ap-southeast-1”
- Choose a region that makes sense for your global architecture
- Consider region proximity to your users for performance
- Also consider regional pricing differences
- Name: Either keep the same name or modify it to indicate the region
- For example: “web-server-base-v1-tokyo”
- Using a consistent naming convention with region identifiers helps organization
- Description: Update the description for the new region if desired
- For example: “Tokyo region copy of web server base image - May 2025”
- Encryption settings:
- If your source AMI is encrypted, you must specify a KMS key for the destination region
- If your source AMI is unencrypted:
- You can keep it unencrypted by leaving “Encrypt target EBS snapshots” unchecked
- Or encrypt it by checking this box and selecting a KMS key
- Tags: Check “Copy tags” to maintain the same tags in the destination
- Destination region: Select your target region from the dropdown menu
- Review all settings for accuracy
- Click “Copy AMI” button to start the copying process
- You’ll see a confirmation message with the new AMI ID in the destination region
- The copying process usually takes 10-30 minutes depending on the AMI size
- Larger AMIs with multiple or large volumes will take longer to copy
-
Monitor Copy Progress:
- You can switch to the destination region immediately to monitor progress
- In the top navigation bar, click on the region dropdown (currently showing ap-south-1)
- Select your destination region (e.g., ap-northeast-1 for Tokyo)
- Navigate to “AMIs” under “Images” in the left navigation panel
- Find your copying AMI - it will have the name you specified and status “Pending”
- Refresh periodically to check progress
- The AMI is available for use when the status changes to “Available”
-
Launch in Destination Region:
- Ensure you’re in the destination region (check the region indicator in the top navigation bar)
- In the AMIs list, find your copied AMI
- Under the “Owned by me” filter, locate it by name or by sorting by creation time
- If it doesn’t appear right away, wait a few minutes and refresh the page
- Once the AMI shows status “Available”, select it by clicking its checkbox
- From the “Actions” dropdown, select “Launch instance from AMI”
- Complete the instance launch wizard:
- Enter a name for your instance
- Select an appropriate instance type
- Choose or create a key pair for the destination region
- Important: Key pairs are region-specific, so you may need to create a new one
- Configure networking settings for this region
- Select a VPC and subnet in the destination region
- Set up appropriate security groups
- Add storage as needed
- Configure any other settings specific to the destination region
- Review and click “Launch instance”
- Wait for the new instance to initialize and pass status checks
- Connect to the new instance to verify everything is working correctly:
ssh -i tokyo-key.pem ubuntu@tokyo-instance-public-ip
Task 4: Implement a Backup Strategy
Steps:
-
Define Backup Requirements:
- Before implementing any technical solution, document your backup requirements:
- Recovery Time Objective (RTO): Maximum acceptable time to restore systems
- For example: “Critical systems must be restored within 1 hour”
- Recovery Point Objective (RPO): Maximum acceptable data loss period
- For example: “Data loss should not exceed 15 minutes for databases”
- Retention periods for different data types:
- Daily backups: 7 days retention
- Weekly backups: 4 weeks retention
- Monthly backups: 12 months retention
- Yearly backups: 7 years retention (for compliance)
- Backup scope: List all resources that need backup protection
- EC2 instances, databases, EBS volumes, etc.
- Geographic redundancy requirements: Need for cross-region backups
- Access controls: Who can create, view, restore, or delete backups
- Recovery Time Objective (RTO): Maximum acceptable time to restore systems
- Create a formal document with these requirements for reference
- Before implementing any technical solution, document your backup requirements:
-
Set Up AWS Backup:
- Sign in to the AWS Management Console and navigate to the AWS Backup service
- Click “Create backup plan” button
- You have three options:
- Start with a template (recommended for beginners)
- Build a new plan (for custom configurations)
- Define using JSON (for automation/IaC)
- For template option:
- Select a template that best matches your requirements:
- Daily, Monthly, and 1-year retention (common choice)
- Daily, Weekly, Monthly, and 7-year retention (compliance-focused)
- Daily and 1-month retention (basic option)
- Enter a backup plan name: “Production-Complete-Backup”
- Optionally add a backup plan tag (e.g., Key: “Purpose”, Value: “Production Backup”)
- Click “Create plan” button
- Select a template that best matches your requirements:
- For the build new plan option:
- Enter backup plan name: “Custom-Production-Backup”
- Add backup rules:
- Click “Add backup rule”
- Enter rule name: “Daily-Database-Backup”
- Select backup vault: “Default” or create a new one
- Assign a backup rule schedule:
- Set frequency: Daily
- Set time: 02:00 UTC (or during your low-traffic period)
- Set retention period: e.g., 35 days
- Configure lifecycle settings if needed
- Enable continuous backups for point-in-time recovery (if needed)
- Configure advanced settings if needed
- Click “Create backup rule”
- Add more rules as needed for different schedules (weekly, monthly)
- Click “Create plan” button
-
Assign Resources to Backup Plan:
- After creating the backup plan, you’ll be prompted to assign resources
- Click “Assign resources” button
- Enter a resource assignment name: “Production-Resources”
- Select resource assignment options:
- For “Resource selection”:
- “All resource types” (to back up all supported resources)
- “Include specific resource types” (to select specific types)
- “Exclude specific resource types” (to exclude certain types)
- For more granular selection, use tags:
- Under “Assign by tags”:
- Key: “Backup”, Value: “Yes”
- This selects all resources tagged with Backup=Yes
- Alternatively, assign by resource ID:
- Select the resource type and specific resources
- For example, select specific EC2 instances or databases
- Under “Assign by tags”:
- For “Resource selection”:
- Select IAM role:
- Use “Default role” (AWS Backup creates or uses the appropriate role)
- Or select a custom role if you have specific permissions requirements
- Click “Assign resources” button
- The resources are now protected according to your backup plan
-
Tag Resources for Backup Inclusion:
- For tag-based backup selection, tag all required resources:
- EC2 Dashboard > Instances > select instance > Actions > Manage tags
- Add tag Key: “Backup”, Value: “Yes” to include in backups
- Repeat for all resource types (EBS volumes, RDS databases, etc.)
- For easier tag management, consider using AWS Resource Groups or Tag Editor
- You can also use AWS Config rules to enforce backup tagging
- For tag-based backup selection, tag all required resources:
-
Monitor Backup Status:
- In the AWS Backup dashboard, click on “Jobs” in the left navigation panel
- Here you can monitor:
- Backup jobs (ongoing, completed, failed)
- Restore jobs (ongoing, completed, failed)
- Copy jobs (for cross-region copies)
- Set up notifications for backup events:
- Navigate to AWS Backup > Backup plans > your plan
- Click on “Edit” next to Notifications
- Create or select an SNS topic
- Select events to be notified about (successful, failed, or all jobs)
- Click “Save” to enable notifications
-
Test Restore Procedures:
- Regularly test restoration to validate backup integrity:
- In AWS Backup, click “Backup vaults” in the left navigation panel
- Select the vault containing your backups
- Find a recovery point (backup) you want to test
- Click “Actions” > “Restore”
- Follow the restoration wizard for that resource type
- For EC2: Select instance type, subnet, security group, etc.
- For EBS: Choose volume type, availability zone, etc.
- For RDS: Select DB instance class, storage, etc.
- After restoration completes, verify the restored resource works correctly:
- For EC2 instances, connect and verify applications run
- For databases, verify data integrity and application connectivity
- For EFS/FSx, verify file access and integrity
- Document the restoration process, including time taken and any issues
- Update your backup strategy based on test results
- Regularly test restoration to validate backup integrity:
-
Document and Review Your Strategy:
- Create comprehensive documentation of your backup implementation:
- Backup schedules, retention policies, and coverage
- Restoration procedures for different scenarios
- Roles and responsibilities during recovery
- Testing schedule and success criteria
- Review and update your backup strategy quarterly:
- Evaluate if RPO/RTO requirements are being met
- Check if all critical resources are included
- Analyze any failed backups and address root causes
- Consider cost optimization opportunities
- Create comprehensive documentation of your backup implementation:
These backup and image management techniques ensure your data is protected and your systems can be consistently deployed across your AWS environment, reducing manual configuration and improving disaster recovery capabilities.
Pro Tip: Practice the “golden AMI pipeline” approach by creating a base AMI, using infrastructure as code to layer configurations on top, and regularly updating the base AMI with security patches. This hybrid approach gives you both consistency and flexibility.
IAM Policy Creation for EC2 Access Management
What You’ll Learn
- Creating custom IAM policies for fine-grained EC2 access control
- Understanding policy structure and elements
- Implementing least privilege principle for EC2 management
- Using policy conditions for advanced access control
In this section, you’ll learn how to implement fine-grained access control for your EC2 resources using AWS Identity and Access Management (IAM). Proper IAM permissions are the foundation of a secure AWS environment. Instead of giving your team members full access to everything, you’ll create * *custom policies** that grant just enough permissions for them to do their jobs—nothing more, nothing less. This **least privilege approach** significantly reduces your security risk while still enabling your team to be productive.
Key Concepts
| Concept | Description |
|---|---|
| IAM Policy | JSON document that defines permissions for AWS resources |
| Effect | Determines whether to Allow or Deny the specified actions |
| Actions | Specific operations that can be performed (e.g., ec2:StartInstances) |
| Resources | AWS entities that the policy applies to, identified by ARNs |
| Conditions | Circumstances under which the policy is in effect |
| Permissions Boundary | Sets maximum permissions an IAM entity can have |
| Policy Evaluation Logic | How AWS determines if a request should be allowed or denied |
Task 1: Understand IAM Policy Structure and Best Practices
Steps:
-
Analyze IAM Policy Structure:
- Every IAM policy follows a consistent JSON structure with required elements:
{ "Version": "2012-10-17", "Statement": [ { "Sid": "UniqueStatementIdentifier", "Effect": "Allow", "Action": ["service:Action1", "service:Action2"], "Resource": ["arn:aws:service:region:account-id:resource-type/resource-id"], "Condition": { "ConditionOperator": { "key": "value" } } } ] }- Key elements explanation:
Version: Almost always “2012-10-17” (the latest IAM policy language version)Statement: Array containing one or more permission statementsSid: Optional identifier for the statement (helps with organization)Effect: Either “Allow” or “Deny” - determines whether to permit or block the actionAction: The specific AWS API operations being allowed or deniedResource: The specific AWS resources the actions apply toCondition: Optional circumstances under which the policy applies
-
Review IAM Policy Best Practices:
- Create a reference document for your team:
cat > iam-best-practices.md << EOF # IAM Policy Best Practices ## Security Principles 1. **Follow the Principle of Least Privilege** - Grant only the permissions required to perform a task - Start with minimal permissions and add more as needed - Periodically review and remove unused permissions 2. **Use IAM Roles Instead of Long-term Access Keys** - For EC2 instances, always use IAM roles instead of storing access keys - For programmatic access from outside AWS, consider temporary credentials 3. **Implement Strong Password Policies** - Require complex passwords with minimum length - Enable MFA for all users, especially those with administrative access 4. **Regularly Audit and Rotate Credentials** - Use AWS IAM Access Analyzer to identify unused permissions - Set up credential rotation schedules ## Policy Creation Guidelines 1. **Be Specific with Resources** - Avoid wildcards (*) in resource ARNs when possible - Scope policies to specific resources instead of "Resource": "*" 2. **Use Conditions to Further Refine Access** - Restrict access by IP address range - Limit actions to specific time periods - Require MFA for sensitive operations - Enforce tag-based access control 3. **Organize with Multiple Statements** - Group related permissions into separate statements with descriptive Sids - Makes policies easier to understand and maintain 4. **Use Policy Variables** - Utilize ${aws:username} and other variables to create dynamic policies - Reduces the need for user-specific policies 5. **Apply Permission Boundaries** - Set maximum permissions a user can have regardless of policies attached - Critical for delegating permissions management safely ## Documentation and Management 1. **Add Comments and Descriptive Names** - Use descriptive policy names that indicate purpose - Add comments in the policy description field - Include Sid values that explain the statement's purpose 2. **Version Control Your Policies** - Keep policy documents in version control - Document the purpose and scope of each policy - Track changes over time EOF -
Understanding How IAM Policies Are Evaluated:
- Create a flowchart for your team:
 cat > iam-evaluation-logic.md << EOF
 # IAM Policy Evaluation Logic

 ## Decision Flow

 1. **Default Deny**: By default, all requests are implicitly denied
 2. **Evaluation Order**:
    a. Check for explicit DENY statements (across all policy types)
    b. Check for explicit ALLOW statements (across all policy types)
    c. If no ALLOW is found, default to implicit DENY
 3. **A single explicit DENY overrides any number of ALLOW statements**

 ## Policy Types (Evaluated Together)

 1. **Identity-based policies** - Attached to IAM users, groups, or roles
 2. **Resource-based policies** - Attached directly to resources (like S3 buckets)
 3. **IAM permissions boundaries** - Sets maximum permissions for an entity
 4. **Service control policies (SCPs)** - Applied at AWS Organizations level
 5. **Session policies** - Used with temporary sessions

 ## Practical Example

 Consider a user with these policies:
 - User policy ALLOWS ec2:StartInstances on all resources
 - Permissions boundary ALLOWS only ec2:DescribeInstances
 - Group policy DENIES ec2:StartInstances after business hours

 Result:
 - During business hours: User can only describe instances (boundary is limiting)
 - After business hours: User can only describe instances (boundary is limiting)
 - If group policy didn't exist: User could still only describe instances
 EOF
flowchart TD Request[API Request] --> SCPs{Service Control
Policies} SCPs -->|Deny| Denied[Request Denied] SCPs -->|No Deny| ResourcePolicies{Resource
Policies} ResourcePolicies -->|Deny| Denied ResourcePolicies -->|No Deny| PermBoundary{Permissions
Boundaries} PermBoundary -->|Deny| Denied PermBoundary -->|No Deny| SessionPolicies{Session
Policies} SessionPolicies -->|Deny| Denied SessionPolicies -->|No Deny| IdentityPolicies{Identity
Policies} IdentityPolicies -->|Deny| Denied IdentityPolicies -->|Allow| Allowed[Request Allowed] IdentityPolicies -->|No Allow| ImplicitDeny[Request Denied
Implicit Deny] classDef denied fill:#FF5252,stroke:#880000,color:white; classDef allowed fill:#66BB6A,stroke:#005500,color:white; classDef policy fill:#42A5F5,stroke:#0D47A1,color:white; class Denied denied; class Allowed allowed; class SCPs,ResourcePolicies,PermBoundary,SessionPolicies,IdentityPolicies policy; class ImplicitDeny denied;
Task 2: Create Basic EC2 Management Policies
Steps:
-
Create a Read-Only EC2 Policy:
- Navigate to IAM dashboard: AWS Management Console > Services > IAM
- Click “Policies” in the left navigation menu
- Click “Create policy”
- Choose the JSON editor and input:
{ "Version": "2012-10-17", "Statement": [ { "Sid": "AllowEC2ReadOnly", "Effect": "Allow", "Action": ["ec2:Describe*", "ec2:Get*", "ec2:List*"], "Resource": "*" }, { "Sid": "AllowConsoleAccess", "Effect": "Allow", "Action": [ "iam:ListInstanceProfiles", "iam:GetInstanceProfile", "iam:GetRole", "elasticloadbalancing:Describe*" ], "Resource": "*" } ] }- Click “Next: Tags” (optional: add tags to help organize your policies)
- Click “Next: Review”
- Name:
EC2ReadOnlyAccess - Description: “Provides read-only access to EC2 resources and related services”
- Click “Create policy”
-
Create an EC2 Operator Policy:
- Follow the same steps as above, but with this policy JSON:
{ "Version": "2012-10-17", "Statement": [ { "Sid": "AllowEC2Management", "Effect": "Allow", "Action": [ "ec2:Describe*", "ec2:Get*", "ec2:List*", "ec2:StartInstances", "ec2:StopInstances", "ec2:RebootInstances" ], "Resource": "*" }, { "Sid": "DenyEC2InstanceDeletion", "Effect": "Deny", "Action": ["ec2:TerminateInstances"], "Resource": "*" }, { "Sid": "AllowRelatedServices", "Effect": "Allow", "Action": [ "cloudwatch:GetMetricStatistics", "cloudwatch:ListMetrics", "elasticloadbalancing:Describe*", "iam:ListInstanceProfiles", "iam:GetInstanceProfile" ], "Resource": "*" } ] }- Name:
EC2OperatorAccess - Description: “Allows managing EC2 instances (start, stop, reboot) but prevents termination”
-
Create a Full EC2 Administrator Policy:
- Follow the same steps with this JSON:
{ "Version": "2012-10-17", "Statement": [ { "Sid": "AllowFullEC2Management", "Effect": "Allow", "Action": ["ec2:*"], "Resource": "*" }, { "Sid": "AllowRelatedServices", "Effect": "Allow", "Action": [ "elasticloadbalancing:*", "cloudwatch:*", "autoscaling:*", "iam:ListInstanceProfiles", "iam:GetInstanceProfile", "iam:PassRole" ], "Resource": "*" } ] } - Name:
EC2AdministratorAccess - Description: “Provides full access to EC2 and related services needed for complete administration”
- Follow the same steps with this JSON:
Task 3: Implement Advanced EC2 Policies with Conditions
Steps:
-
Create a Tag-Based Access Control Policy:
- In the IAM console, create a new policy
- Use this JSON that restricts EC2 actions to instances with specific tags:
{ "Version": "2012-10-17", "Statement": [ { "Sid": "AllowEC2ReadOnly", "Effect": "Allow", "Action": ["ec2:Describe*", "ec2:Get*", "ec2:List*"], "Resource": "*" }, { "Sid": "AllowActionsOnTaggedInstances", "Effect": "Allow", "Action": ["ec2:StartInstances", "ec2:StopInstances", "ec2:RebootInstances"], "Resource": "arn:aws:ec2:*:*:instance/*", "Condition": { "StringEquals": { "aws:ResourceTag/Environment": ["Dev", "Test"] } } }, { "Sid": "AllowTaggingWithRestrictions", "Effect": "Allow", "Action": ["ec2:CreateTags", "ec2:DeleteTags"], "Resource": "*", "Condition": { "StringEquals": { "aws:RequestTag/Environment": ["Dev", "Test"], "ec2:ResourceTag/Environment": ["Dev", "Test"] }, "ForAllValues:StringEquals": { "aws:TagKeys": ["Environment", "Project", "Owner", "CostCenter"] } } }, { "Sid": "RequireEnvironmentTag", "Effect": "Deny", "Action": ["ec2:RunInstances"], "Resource": "arn:aws:ec2:*:*:instance/*", "Condition": { "Null": { "aws:RequestTag/Environment": "true" } } } ] }- Name:
EC2TagBasedAccessPolicy - Description: “Allows management of EC2 instances based on Environment tag and enforces tagging standards”
-
Create a Time and IP-Based Access Policy:
- This policy restricts EC2 actions to specific time windows and IP ranges:
{ "Version": "2012-10-17", "Statement": [ { "Sid": "AllowEC2ReadOnly", "Effect": "Allow", "Action": ["ec2:Describe*", "ec2:Get*", "ec2:List*"], "Resource": "*" }, { "Sid": "AllowEC2ActionsDuringBusinessHours", "Effect": "Allow", "Action": ["ec2:StartInstances", "ec2:StopInstances", "ec2:RebootInstances", "ec2:RunInstances"], "Resource": "*", "Condition": { "DateGreaterThan": { "aws:CurrentTime": "2023-01-01T09:00:00Z" }, "DateLessThan": { "aws:CurrentTime": "2023-01-01T17:00:00Z" }, "IpAddress": { "aws:SourceIp": ["192.0.2.0/24", "203.0.113.0/24"] } } }, { "Sid": "DenyEC2ActionsOutsideBusinessHours", "Effect": "Deny", "Action": [ "ec2:StartInstances", "ec2:StopInstances", "ec2:RebootInstances", "ec2:RunInstances", "ec2:TerminateInstances" ], "Resource": "*", "Condition": { "DateGreaterThan": { "aws:CurrentTime": "2023-01-01T17:00:00Z" }, "DateLessThan": { "aws:CurrentTime": "2023-01-01T09:00:00Z" } } } ] }- Name:
EC2BusinessHoursPolicy - Description: “Restricts EC2 management actions to business hours and specific IP ranges”
- Note: Update the time and IP ranges to match your organization’s requirements
-
Create a Resource-Specific EC2 Policy:
- This policy grants permissions for specific EC2 instances or instance types:
{ "Version": "2012-10-17", "Statement": [ { "Sid": "AllowEC2ReadOnly", "Effect": "Allow", "Action": ["ec2:Describe*"], "Resource": "*" }, { "Sid": "AllowActionsOnSpecificInstances", "Effect": "Allow", "Action": ["ec2:StartInstances", "ec2:StopInstances", "ec2:RebootInstances"], "Resource": [ "arn:aws:ec2:us-east-1:123456789012:instance/i-1234567890abcdef0", "arn:aws:ec2:us-east-1:123456789012:instance/i-abcdef1234567890a" ] }, { "Sid": "RestrictInstanceTypes", "Effect": "Allow", "Action": "ec2:RunInstances", "Resource": "arn:aws:ec2:*:*:instance/*", "Condition": { "StringEquals": { "ec2:InstanceType": ["t2.micro", "t3.micro"] } } }, { "Sid": "AllowRunInstancesForApprovedTypes", "Effect": "Allow", "Action": "ec2:RunInstances", "Resource": [ "arn:aws:ec2:*:*:subnet/*", "arn:aws:ec2:*:*:network-interface/*", "arn:aws:ec2:*:*:security-group/*", "arn:aws:ec2:*:*:volume/*", "arn:aws:ec2:*:*:key-pair/*", "arn:aws:ec2:*:*:image/*" ] } ] } - Name:
EC2SpecificResourcePolicy - Description: “Allows actions on specific EC2 instances and restricts instance types”
- Note: Update the ARNs with your actual instance IDs and account number
- This policy grants permissions for specific EC2 instances or instance types:
Task 4: Attach and Test Policies
Steps:
-
Create Test Users and Groups:
- In the IAM console, click “User groups” and create these groups:
- Group name:
EC2Readers - Group name:
EC2Operators - Group name:
EC2Administrators
- Group name:
- Attach your custom policies to the appropriate groups:
- For
EC2Readersgroup: attachEC2ReadOnlyAccess - For
EC2Operatorsgroup: attachEC2OperatorAccessandEC2TagBasedAccessPolicy - For
EC2Administratorsgroup: attachEC2AdministratorAccess
- For
- Create test users in the IAM console:
- User 1:
ec2-reader- Add toEC2Readersgroup - User 2:
ec2-operator- Add toEC2Operatorsgroup - User 3:
ec2-admin- Add toEC2Administratorsgroup
- User 1:
- For each user:
- Enable AWS Management Console access
- Set a custom password or use auto-generated passwords
- Require password reset on next sign-in (optional)
- In the IAM console, click “User groups” and create these groups:
-
Test Permissions with Different Users:
- Open a new incognito/private browser window
- Navigate to your AWS account sign-in page and log in as
ec2-reader - Navigate to the EC2 dashboard and:
- Verify you can view instances and resources
- Verify you cannot start/stop EC2 instances
- Verify you cannot modify EC2 resources
- Repeat the process for the
ec2-operatoruser:- Verify you can view instances
- Try starting/stopping an instance with proper tags (should succeed)
- Try starting/stopping an instance without proper tags (should fail)
- Try terminating an instance (should fail)
- Finally, test as
ec2-admin:- Verify you can perform all EC2 operations
- Create a new instance with and without tags
- Test advanced operations like creating AMIs, volumes, etc.
-
Create Test Instances with Appropriate Tags:
- Log in as the
ec2-adminuser - Launch instances with specific tags:
# Create Dev test instance aws ec2 run-instances \ --image-id ami-0c55b159cbfafe1f0 \ --instance-type t2.micro \ --count 1 \ --security-group-ids sg-12345678 \ --subnet-id subnet-12345678 \ --tag-specifications 'ResourceType=instance,Tags=[{Key=Environment,Value=Dev},{Key=Project,Value=Testing},{Key=Owner,Value=IAMTester}]' # Create Test environment instance aws ec2 run-instances \ --image-id ami-0c55b159cbfafe1f0 \ --instance-type t2.micro \ --count 1 \ --security-group-ids sg-12345678 \ --subnet-id subnet-12345678 \ --tag-specifications 'ResourceType=instance,Tags=[{Key=Environment,Value=Test},{Key=Project,Value=Testing},{Key=Owner,Value=IAMTester}]' # Create Prod environment instance aws ec2 run-instances \ --image-id ami-0c55b159cbfafe1f0 \ --instance-type t2.micro \ --count 1 \ --security-group-ids sg-12345678 \ --subnet-id subnet-12345678 \ --tag-specifications 'ResourceType=instance,Tags=[{Key=Environment,Value=Prod},{Key=Project,Value=Testing},{Key=Owner,Value=IAMTester}]' - Log in as the
-
Validate Policy Behavior with CloudTrail:
- In the AWS Management Console, navigate to CloudTrail
- Click on “Event history”
- Filter by:
- Event source:
ec2.amazonaws.com - User name: Your test user names
- Event source:
- Review the events to confirm:
- Allowed actions were successful
- Denied actions were blocked
- The conditions in your policies are working as expected
-
Document Results and Adjust Policies:
- Create a spreadsheet or document to track:
- Which actions each user attempted
- Whether each action succeeded or failed
- Any unexpected behaviors or errors
- For any issues found, adjust your policies:
- Add missing permissions if legitimate actions were blocked
- Further restrict permissions if unauthorized actions were allowed
- Fix any syntax or logical errors
- Re-test after each adjustment to confirm the changes work as expected
- Create a spreadsheet or document to track:
Task 5: Implement Permission Boundaries
Steps:
-
Create a Permission Boundary Policy:
- In the IAM console, create a new policy
- Use this JSON that sets the maximum permissions any user or role can have:
{ "Version": "2012-10-17", "Statement": [ { "Sid": "AllowEC2Actions", "Effect": "Allow", "Action": ["ec2:*"], "Resource": "*" }, { "Sid": "AllowSupportingServices", "Effect": "Allow", "Action": [ "elasticloadbalancing:Describe*", "cloudwatch:GetMetricStatistics", "cloudwatch:ListMetrics", "autoscaling:Describe*", "iam:ListInstanceProfiles", "iam:GetInstanceProfile", "iam:PassRole" ], "Resource": "*" }, { "Sid": "DenyDangerousActions", "Effect": "Deny", "Action": [ "ec2:DeleteVpc", "ec2:DeleteSubnet", "ec2:DeleteRouteTable", "ec2:DeleteInternetGateway", "ec2:DeleteNatGateway", "iam:*" ], "Resource": "*" }, { "Sid": "DenyNonEC2Services", "Effect": "Deny", "NotAction": [ "ec2:*", "elasticloadbalancing:Describe*", "cloudwatch:GetMetricStatistics", "cloudwatch:ListMetrics", "autoscaling:Describe*", "iam:ListInstanceProfiles", "iam:GetInstanceProfile", "iam:PassRole", "sts:AssumeRole", "sts:GetCallerIdentity" ], "Resource": "*" } ] }- Name:
EC2PermissionBoundary - Description: “Sets maximum permissions for EC2 management roles and prevents access to other services”
-
Apply Permission Boundary to Users:
- In the IAM console, go to Users
- Click on your
ec2-adminuser - Click the “Permissions boundaries” tab
- Click “Set permissions boundary”
- Select your
EC2PermissionBoundarypolicy - Click “Set boundary”
- The user now cannot perform actions outside the boundary scope, even if their attached policies allow it
-
Test Permission Boundary Effects:
- Log in as the
ec2-adminuser - Try to access other AWS services like S3 or DynamoDB (should be denied)
- Try to perform dangerous EC2 actions listed in the DenyDangerousActions section (should be denied)
- Try to perform allowed EC2 actions (should still succeed)
- This demonstrates how permission boundaries provide an extra layer of security
- Log in as the
-
Implement MFA Protection for Sensitive Actions:
- Create a policy to require MFA for sensitive operations:
{ "Version": "2012-10-17", "Statement": [ { "Sid": "AllowViewAccountInfo", "Effect": "Allow", "Action": [ "iam:ListVirtualMFADevices", "iam:ListUsers", "iam:GetAccountPasswordPolicy", "iam:GetAccountSummary" ], "Resource": "*" }, { "Sid": "AllowManageOwnVirtualMFADevice", "Effect": "Allow", "Action": ["iam:CreateVirtualMFADevice", "iam:DeleteVirtualMFADevice"], "Resource": "arn:aws:iam::*:mfa/${aws:username}" }, { "Sid": "AllowManageOwnUserMFA", "Effect": "Allow", "Action": ["iam:EnableMFADevice", "iam:ListMFADevices", "iam:ResyncMFADevice"], "Resource": "arn:aws:iam::*:user/${aws:username}" }, { "Sid": "AllowEC2ReadOnlyWithoutMFA", "Effect": "Allow", "Action": ["ec2:Describe*", "ec2:Get*", "ec2:List*"], "Resource": "*" }, { "Sid": "AllowEC2ActionsWithMFA", "Effect": "Allow", "Action": ["ec2:StartInstances", "ec2:StopInstances", "ec2:RebootInstances", "ec2:TerminateInstances"], "Resource": "*", "Condition": { "Bool": { "aws:MultiFactorAuthPresent": "true" }, "NumericLessThan": { "aws:MultiFactorAuthAge": "3600" } } } ] } - Name:
EC2MFAProtectedPolicy - Description: “Requires MFA for sensitive EC2 actions while allowing read-only access without MFA”
- Create a policy to require MFA for sensitive operations:
In this section, we’ve built a comprehensive IAM policy framework for EC2 management. By implementing these fine-grained access controls, you’ve significantly enhanced your AWS environment’s security while still providing appropriate access to users based on their responsibilities. The permission boundaries add an extra layer of protection, ensuring that even administrative users can’t exceed intended permission scopes. These IAM best practices are key components of a well-architected AWS environment.
Pro Tip: Use AWS IAM Access Analyzer to continuously monitor and refine your permissions. It helps identify unused permissions and potential security risks, allowing you to maintain the principle of least privilege over time.
Steps:
-
Create New Policy:
- IAM dashboard > Policies > Create policy > JSON tab
- Add policy for EC2 operations with tag-based restrictions:
{ "Version": "2012-10-17", "Statement": [ { "Sid": "AllowEC2InstanceOperations", "Effect": "Allow", "Action": ["ec2:DescribeInstances", "ec2:StartInstances", "ec2:StopInstances", "ec2:RebootInstances"], "Resource": "arn:aws:ec2:*:*:instance/*", "Condition": { "StringEquals": { "aws:ResourceTag/Department": "DevOps" } } }, { "Sid": "AllowEC2GeneralDescribeActions", "Effect": "Allow", "Action": ["ec2:Describe*"], "Resource": "*" } ] } -
Review and Create Policy:
- Click Review policy
- Name:
EC2OperatorCustomPolicy - Description: “Allows start, stop, reboot operations on instances tagged with Department:DevOps”
- Create policy
Task 3: Create Instance Deployment Policy
Steps:
-
Create New Policy:
- IAM dashboard > Policies > Create policy
- Choose the JSON tab
- Enter policy document:
{ "Version": "2012-10-17", "Statement": [ { "Sid": "AllowLaunchingEC2Instances", "Effect": "Allow", "Action": ["ec2:RunInstances"], "Resource": [ "arn:aws:ec2:*:*:instance/*", "arn:aws:ec2:*:*:volume/*", "arn:aws:ec2:*:*:network-interface/*" ], "Condition": { "StringEquals": { "aws:RequestTag/Environment": ["Dev", "Test"] } } }, { "Sid": "AllowAMIAndSubnetUsage", "Effect": "Allow", "Action": "ec2:RunInstances", "Resource": ["arn:aws:ec2:*:*:subnet/subnet-*", "arn:aws:ec2:*:*:image/ami-*"] }, { "Sid": "RequireTaggingOnResourceCreation", "Effect": "Allow", "Action": "ec2:CreateTags", "Resource": "*", "Condition": { "StringEquals": { "ec2:CreateAction": "RunInstances" } } }, { "Sid": "AllowDescribing", "Effect": "Allow", "Action": ["ec2:Describe*"], "Resource": "*" } ] } -
Review and Create Policy:
- Click Review policy
- Name:
EC2DeploymentCustomPolicy - Description: “Allows EC2 instance creation with required tagging for Dev and Test environments”
- Create policy
Task 4: Attach and Test Policies
Steps:
- Test and Refine Policies:
- Create test user: IAM dashboard > Users > Add users > name as
ec2-operator-test - Configure console access, attach your custom policy, and create user
- Test permissions by logging in as test user and verifying:
- Tag-based access works (can only manage instances with correct tags)
- Permission boundaries function as designed
- Denied actions are properly blocked
- Refine policy based on test results (add/modify actions, resources, conditions)
- Create test user: IAM dashboard > Users > Add users > name as
Task 5: Add MFA Enforcement (Advanced)
Steps:
-
Update Policy with MFA Condition:
- Edit your custom policy
- Add a condition block requiring MFA:
"Condition": { "Bool": { "aws:MultiFactorAuthPresent": "true" } } -
Test MFA Enforcement:
- Configure MFA for test user
- Test access with and without MFA authentication
- Verify policy enforcement works as expected
These custom IAM policies provide fine-grained control over your AWS resources, ensuring users can only perform authorized actions on specific resources, aligning with security best practices and regulatory compliance requirements.
Pro Tip: Use AWS IAM Access Analyzer to review policies for security issues or unintended access. It can identify resources shared with external entities and help validate that your policies provide only the intended access.
S3 Buckets with AWS CLI
- Creating and managing S3 buckets via command line
- Uploading, downloading, and synchronizing files
- Setting bucket policies and access controls
- Implementing lifecycle policies for cost optimization
This section covers how to efficiently manage Amazon S3 storage using the AWS Command Line Interface, providing you with powerful scripting capabilities for automation.
Key Concepts
| Concept | Description |
|---|---|
| AWS CLI | Command line tool for interacting with AWS services |
| S3 (Simple Storage Service) | Object storage service offering scalability, availability, and security |
| Bucket | Container for objects stored in S3 |
| Object | File and any metadata that describes the file stored in S3 |
| Prefix | S3 way to organize data in a hierarchy similar to directories |
| Lifecycle Policy | Rules to automatically transition objects between storage classes or delete them |
| Versioning | Feature that keeps multiple variants of an object in the same bucket |
| Presigned URL | URL that grants temporary access to specific S3 objects |
Task 1: Install and Configure AWS CLI
Steps:
-
Install AWS CLI:
- The AWS Command Line Interface (CLI) is a powerful tool for interacting with AWS services from your terminal
- Follow these installation steps based on your operating system:
For Ubuntu or other Debian-based Linux:
 # First, update your package lists and install dependencies
 sudo apt update
 sudo apt install -y unzip curl

 # Download the AWS CLI installation package
 curl "https://awscli.amazonaws.com/awscli-exe-linux-x86_64.zip" -o "awscliv2.zip"

 # Unzip the installation package
 unzip awscliv2.zip

 # Run the installer
 sudo ./aws/install

 # Clean up the downloaded files (optional)
 rm -f awscliv2.zip
 rm -rf aws/

 # Verify installation was successful
 aws --version
 # You should see output like: aws-cli/2.x.x Python/3.x.x Linux/x.x.x
For Red Hat, Amazon Linux, or CentOS:
 # Install dependencies
 sudo yum update -y
 sudo yum install -y unzip

 # Download and install AWS CLI
 curl "https://awscli.amazonaws.com/awscli-exe-linux-x86_64.zip" -o "awscliv2.zip"
 unzip awscliv2.zip
 sudo ./aws/install

 # Clean up downloaded files
 rm -f awscliv2.zip
 rm -rf aws/
For macOS:
 # Method 1: Using Homebrew (recommended if you have Homebrew)
 brew install awscli

 # Method 2: Direct installation
 # Download the macOS installer package
 curl "https://awscli.amazonaws.com/AWSCLIV2.pkg" -o "AWSCLIV2.pkg"

 # Install the package
 sudo installer -pkg AWSCLIV2.pkg -target /

 # Clean up downloaded file
 rm -f AWSCLIV2.pkg
For Windows:
- Download the official AWS CLI MSI installer from: https://awscli.amazonaws.com/AWSCLIV2.msi
- Run the downloaded MSI installer and follow the on-screen instructions
- Open a new Command Prompt or PowerShell window and run
aws --versionto verify installation
-
Configure and Verify AWS CLI:
- Before using the AWS CLI, you need to configure it with your AWS credentials and preferences
- You’ll need an AWS access key ID and secret access key:
- These can be obtained from the AWS IAM console
- Go to IAM > Users > your username > Security credentials > Create access key
- Never share these credentials or commit them to code repositories
- Run the configuration wizard:
# Start the interactive configuration process aws configure- You’ll be prompted for four pieces of information:
- AWS Access Key ID: Enter your access key (looks like AKIAIOSFODNN7EXAMPLE)
- AWS Secret Access Key: Enter your secret key (looks like wJalrXUtnFEMI/K7MDENG/bPxRfiCYEXAMPLEKEY)
- Default region name: Enter your preferred region (e.g., ap-south-1 for Mumbai)
- Default output format: Enter your preferred format (json, yaml, text, or table)
- json is recommended for script processing
- table is more human-readable for interactive use
-
The configuration creates two files on your system:
- ~/.aws/credentials - Stores your access keys (secured with file permissions)
- ~/.aws/config - Stores your region and output format preferences
- Verify your configuration is working correctly:
# Check the installed AWS CLI version aws --version # Verify your credentials are working by retrieving your account identity aws sts get-caller-identity # You should see output like: # { # "UserId": "AIDAXXXXXXXXXXXX", # "Account": "123456789012", # "Arn": "arn:aws:iam::123456789012:user/YourUsername" # } -
Configure Named Profiles (Optional but Recommended):
- If you work with multiple AWS accounts, named profiles allow you to switch between them
- Create additional profiles for different environments:
# Configure a named profile for development environment aws configure --profile dev # Configure a named profile for production environment aws configure --profile prod- Use a specific profile for commands:
# List S3 buckets in the dev account aws s3 ls --profile dev # List S3 buckets in the prod account aws s3 ls --profile prod- Set a default profile for your current terminal session:
# Set the current terminal session to use the dev profile export AWS_PROFILE=dev # Now all commands will use the dev profile by default aws s3 ls -
Configure Command Completion (Optional):
- Enable tab completion for easier command entry:
 # For bash
 complete -C '/usr/local/bin/aws_completer' aws

 # Add to ~/.bashrc for permanent configuration
 echo "complete -C '/usr/local/bin/aws_completer' aws" >> ~/.bashrc

 # For zsh
 echo "autoload bashcompinit && bashcompinit" >> ~/.zshrc
 echo "complete -C '/usr/local/bin/aws_completer' aws" >> ~/.zshrc
Task 2: Create and Manage S3 Buckets
Steps:
-
Create and Configure Bucket:
- S3 bucket names must be globally unique across all AWS accounts worldwide
- Choose a bucket name that reflects your organization and purpose
-
Follow the bucket naming rules:
- 3-63 characters long
- Only lowercase letters, numbers, periods, and hyphens
- Must start and end with a letter or number
- Cannot be formatted as an IP address (e.g., 192.168.1.1)
- Cannot start with the prefix “xn–” or end with the suffix “-s3alias”
- Create a new S3 bucket in your preferred region:
# Create a bucket with a unique name in the Mumbai region # Replace "my-unique-bucket-name-123" with your chosen globally unique name # Adding your company name, date, or random numbers helps ensure uniqueness aws s3 mb s3://my-unique-bucket-name-123 --region ap-south-1 # If successful, you'll see output like: # make_bucket: my-unique-bucket-name-123 # If you get an error like "BucketAlreadyExists", try a different name- List all your S3 buckets to confirm creation:
# This lists all buckets in your account aws s3 ls # The output will show bucket names and creation dates: # 2025-05-25 09:32:45 my-unique-bucket-name-123- Check the contents of your bucket (empty at this point):
# List all objects in the bucket (including in subdirectories) aws s3 ls s3://my-unique-bucket-name-123 --recursive # No output means the bucket is empty- Enable versioning for your bucket (recommended for data protection):
# Versioning keeps all versions of objects, protecting against accidental deletion aws s3api put-bucket-versioning \ --bucket my-unique-bucket-name-123 \ --versioning-configuration Status=Enabled # This command has no output when successful- Verify versioning is enabled:
# Check the versioning status of your bucket aws s3api get-bucket-versioning --bucket my-unique-bucket-name-123 # Expected output: # { # "Status": "Enabled" # }- Configure default encryption for the bucket (best practice):
# Enable server-side encryption with Amazon S3-managed keys (SSE-S3) aws s3api put-bucket-encryption \ --bucket my-unique-bucket-name-123 \ --server-side-encryption-configuration '{ "Rules": [ { "ApplyServerSideEncryptionByDefault": { "SSEAlgorithm": "AES256" }, "BucketKeyEnabled": true } ] }' # Check encryption configuration aws s3api get-bucket-encryption --bucket my-unique-bucket-name-123- Block public access to the bucket (security best practice):
# Block all public access to the bucket and its objects aws s3api put-public-access-block \ --bucket my-unique-bucket-name-123 \ --public-access-block-configuration '{ "BlockPublicAcls": true, "IgnorePublicAcls": true, "BlockPublicPolicy": true, "RestrictPublicBuckets": true }' # Verify public access block settings aws s3api get-public-access-block --bucket my-unique-bucket-name-123- Add tags to your bucket for organization and cost tracking:
# Add descriptive tags to the bucket aws s3api put-bucket-tagging \ --bucket my-unique-bucket-name-123 \ --tagging '{ "TagSet": [ { "Key": "Project", "Value": "WebAssets" }, { "Key": "Environment", "Value": "Production" }, { "Key": "Owner", "Value": "Marketing" } ] }' # Verify tags were applied aws s3api get-bucket-tagging --bucket my-unique-bucket-name-123- Create a bucket folder structure (S3 uses prefixes as folders):
 # Create "folder" structure by uploading empty objects with trailing slashes
 # This is optional but helps with organization
 aws s3api put-object \
   --bucket my-unique-bucket-name-123 \
   --key images/

 aws s3api put-object \
   --bucket my-unique-bucket-name-123 \
   --key documents/

 aws s3api put-object \
   --bucket my-unique-bucket-name-123 \
   --key logs/

 # Verify the folder structure
 aws s3 ls s3://my-unique-bucket-name-123/
 # Expected output:
 # PRE documents/
 # PRE images/
 # PRE logs/
Task 3: Upload and Download Files
Steps:
-
Upload Files to S3:
- First, create some sample files for testing uploads:
# Create a simple text file echo "This is a test file for S3 upload demo" > local-file.txt # Create a directory with multiple files mkdir -p my-local-directory/subdirectory echo "Main directory file" > my-local-directory/main-file.txt echo "Subdirectory file" > my-local-directory/subdirectory/sub-file.txt touch my-local-directory/image.jpg- Upload a single file to the root of your bucket:
# Upload a single file to the bucket aws s3 cp local-file.txt s3://my-unique-bucket-name-123/ # Expected output: # upload: ./local-file.txt to s3://my-unique-bucket-name-123/local-file.txt- Upload with custom metadata (useful for categorization and information):
# Upload a file with custom metadata attributes aws s3 cp local-file.txt s3://my-unique-bucket-name-123/metadata-example.txt \ --metadata "author=JohnDoe,department=Marketing,created=2025-05-25" # Verify the metadata was applied aws s3api head-object \ --bucket my-unique-bucket-name-123 \ --key metadata-example.txt # Output will include the metadata section: # "Metadata": { # "author": "JohnDoe", # "department": "Marketing", # "created": "2025-05-25" # }- Upload with a specific content type (important for browser rendering):
# Upload with specific content type aws s3 cp local-file.txt s3://my-unique-bucket-name-123/webpage.html \ --content-type "text/html" # Verify the content type aws s3api head-object \ --bucket my-unique-bucket-name-123 \ --key webpage.html # The output will include: # "ContentType": "text/html"- Upload multiple files from a directory (recursive):
# Upload an entire directory structure recursively aws s3 cp my-local-directory/ s3://my-unique-bucket-name-123/remote-directory/ \ --recursive # The output will show each file being uploaded: # upload: my-local-directory/main-file.txt to s3://my-unique-bucket-name-123/remote-directory/main-file.txt # upload: my-local-directory/image.jpg to s3://my-unique-bucket-name-123/remote-directory/image.jpg # upload: my-local-directory/subdirectory/sub-file.txt to s3://my-unique-bucket-name-123/remote-directory/subdirectory/sub-file.txt- Upload with server-side encryption (for additional security):
# Upload with server-side encryption specified aws s3 cp local-file.txt s3://my-unique-bucket-name-123/encrypted-file.txt \ --sse AES256 # For files requiring KMS encryption: # aws s3 cp sensitive-file.txt s3://my-unique-bucket-name-123/kms-encrypted.txt \ # --sse aws:kms --sse-kms-key-id YOUR_KMS_KEY_ID- Upload with storage class specification (for cost optimization):
# Upload rarely accessed data directly to a cheaper storage class aws s3 cp archive-data.txt s3://my-unique-bucket-name-123/archived/old-data.txt \ --storage-class STANDARD_IA # For long-term archival: # aws s3 cp ancient-logs.txt s3://my-unique-bucket-name-123/deep-archive/logs-2020.txt \ # --storage-class DEEP_ARCHIVE -
Download Files from S3:
- Download a single file from the bucket:
# Download a file to the current directory aws s3 cp s3://my-unique-bucket-name-123/local-file.txt ./downloaded-file.txt # Expected output: # download: s3://my-unique-bucket-name-123/local-file.txt to ./downloaded-file.txt # Verify the content cat downloaded-file.txt- Download an entire directory recursively:
# Create a destination directory mkdir -p ./downloaded-files # Download all files from a "folder" in the bucket aws s3 cp s3://my-unique-bucket-name-123/remote-directory/ ./downloaded-files/ \ --recursive # Output will show each file downloaded: # download: s3://my-unique-bucket-name-123/remote-directory/main-file.txt to ./downloaded-files/main-file.txt # download: s3://my-unique-bucket-name-123/remote-directory/image.jpg to ./downloaded-files/image.jpg # download: s3://my-unique-bucket-name-123/remote-directory/subdirectory/sub-file.txt to ./downloaded-files/subdirectory/sub-file.txt # Verify the structure find ./downloaded-files -type f | sort- Download with progress tracking (helpful for large files):
# Download with progress bar for large files aws s3 cp s3://my-unique-bucket-name-123/remote-directory/image.jpg ./image-with-progress.jpg \ --progress- Download files matching specific patterns:
# Download only files with .txt extension aws s3 cp s3://my-unique-bucket-name-123/remote-directory/ ./text-files/ \ --recursive \ --exclude "*" \ --include "*.txt"- Download a specific version of a versioned object:
# First, list the versions of a file aws s3api list-object-versions \ --bucket my-unique-bucket-name-123 \ --prefix local-file.txt # Then download a specific version using its version ID # Replace VERSION_ID with the actual version ID from the previous command aws s3api get-object \ --bucket my-unique-bucket-name-123 \ --key local-file.txt \ --version-id VERSION_ID \ ./version-specific-file.txt -
Synchronize Directories:
- Sync helps keep local and S3 directories in sync by copying only what’s different
- Sync local directory to S3 (upload changes):
# Make some changes to your local directory echo "New content" > my-local-directory/new-file.txt echo "Updated content" > my-local-directory/main-file.txt # Sync the local directory to S3 (only changed files will be uploaded) aws s3 sync ./my-local-directory/ s3://my-unique-bucket-name-123/remote-directory/ # Output will show only the changed files being synchronized: # upload: my-local-directory/new-file.txt to s3://my-unique-bucket-name-123/remote-directory/new-file.txt # upload: my-local-directory/main-file.txt to s3://my-unique-bucket-name-123/remote-directory/main-file.txt- Sync S3 to local directory (download changes):
# Create a new directory for testing sync download mkdir -p ./sync-download-test # Sync from S3 to local (downloads all files that don't exist locally) aws s3 sync s3://my-unique-bucket-name-123/remote-directory/ ./sync-download-test/ # Output shows all files being downloaded- Sync with deletion (makes destination exactly match source):
# Delete a file from local directory rm my-local-directory/image.jpg # Sync with deletion flag (will remove the file from S3 too) aws s3 sync ./my-local-directory/ s3://my-unique-bucket-name-123/remote-directory/ \ --delete # Output will include: # delete: s3://my-unique-bucket-name-123/remote-directory/image.jpg- Sync with exclusion patterns:
# Sync everything except .jpg files aws s3 sync ./my-local-directory/ s3://my-unique-bucket-name-123/remote-directory/ \ --exclude "*.jpg"- Dry run to preview sync operations without making changes:
# Preview what would be synchronized aws s3 sync ./my-local-directory/ s3://my-unique-bucket-name-123/remote-directory/ \ --dryrun- Schedule regular synchronization with cron (Linux/Mac):
 # Edit your crontab
 crontab -e

 # Add a daily sync at 2 AM:
 # 0 2 * * * /usr/local/bin/aws s3 sync /local/data/ s3://my-unique-bucket-name-123/backup/ >> /var/log/s3-sync.log 2>&1
Task 4: Configure Access Control and Security
Steps:
-
Understand S3 Access Control Methods:
- Before implementing any access control, it’s important to understand the options:
# Create a document to track your access control strategy cat > s3-access-control-strategy.txt << EOF S3 Access Control Methods: 1. Bucket Policies: JSON documents that define permissions for the entire bucket - Best for: Bucket-wide rules, public access, cross-account access 2. IAM Policies: Attached to users/roles to grant permissions to S3 resources - Best for: User-specific permissions within your AWS account 3. Access Control Lists (ACLs): Legacy method for simple permissions - Best for: Simple use cases, object-level permissions - Note: AWS recommends using bucket policies and IAM policies over ACLs 4. Presigned URLs: Temporary URLs that grant time-limited access to objects - Best for: Sharing specific files temporarily without requiring AWS accounts Our strategy: - Use bucket policies for bucket-wide permissions - Use IAM policies for internal user access - Use presigned URLs for temporary external sharing EOF -
Create and Apply a Bucket Policy:
- For this example, we’ll create a bucket policy that:
- Allows read access to specific objects
- Restricts access to a specific AWS account
# Create a bucket policy file (replace 123456789012 with your actual account ID) cat > bucket-policy.json << EOF { "Version": "2012-10-17", "Statement": [ { "Sid": "AllowSpecificAccountAccess", "Effect": "Allow", "Principal": { "AWS": "arn:aws:iam::123456789012:root" }, "Action": [ "s3:GetObject", "s3:ListBucket" ], "Resource": [ "arn:aws:s3:::my-unique-bucket-name-123", "arn:aws:s3:::my-unique-bucket-name-123/*" ] }, { "Sid": "DenyUnencryptedTransport", "Effect": "Deny", "Principal": "*", "Action": "s3:*", "Resource": "arn:aws:s3:::my-unique-bucket-name-123/*", "Condition": { "Bool": { "aws:SecureTransport": "false" } } } ] } EOF # Apply this policy to your bucket aws s3api put-bucket-policy \ --bucket my-unique-bucket-name-123 \ --policy file://bucket-policy.json # Verify the policy was applied correctly aws s3api get-bucket-policy --bucket my-unique-bucket-name-123 # View the policy in a readable format aws s3api get-bucket-policy --bucket my-unique-bucket-name-123 --output text --query Policy | jq . - For this example, we’ll create a bucket policy that:
-
Set Object-Level Permissions with ACLs:
- For specific scenarios where you need object-level permissions:
# Upload a file that will be shared publicly echo "This is public information" > public-info.txt aws s3 cp public-info.txt s3://my-unique-bucket-name-123/ # Make this specific object publicly readable # Note: Bucket must allow ACLs (no public access block for this to work) aws s3api put-object-acl \ --bucket my-unique-bucket-name-123 \ --key public-info.txt \ --acl public-read # Verify the ACL settings aws s3api get-object-acl \ --bucket my-unique-bucket-name-123 \ --key public-info.txt # The object should now be accessible via its S3 URL: # https://my-unique-bucket-name-123.s3.ap-south-1.amazonaws.com/public-info.txt -
Generate Presigned URLs for Temporary Access:
- Presigned URLs are perfect for temporarily sharing private files:
# Create a private file echo "This is confidential information" > confidential.txt aws s3 cp confidential.txt s3://my-unique-bucket-name-123/private/confidential.txt # Generate a presigned URL that expires in 1 hour (3600 seconds) aws s3 presign s3://my-unique-bucket-name-123/private/confidential.txt \ --expires-in 3600 # Output will be a long URL like: # https://my-unique-bucket-name-123.s3.ap-south-1.amazonaws.com/private/confidential.txt?X-Amz-Algorithm=AWS4-HMAC-SHA256&X-Amz-Credential=... # This URL can be shared with anyone, and they can access the file for the next hour # No AWS credentials required to use this URL # For different HTTP methods (e.g., allowing uploads via PUT): aws s3 presign s3://my-unique-bucket-name-123/uploads/new-file.txt \ --expires-in 3600 \ --method PUT -
Enable Cross-Origin Resource Sharing (CORS):
- If your S3 resources will be accessed by web applications:
 # Create a CORS configuration file
 cat > cors-config.json << EOF
 {
   "CORSRules": [
     {
       "AllowedOrigins": ["https://www.yourwebsite.com"],
       "AllowedHeaders": ["*"],
       "AllowedMethods": ["GET", "HEAD", "PUT", "POST", "DELETE"],
       "MaxAgeSeconds": 3000,
       "ExposeHeaders": ["ETag"]
     }
   ]
 }
 EOF

 # Apply the CORS configuration
 aws s3api put-bucket-cors \
   --bucket my-unique-bucket-name-123 \
   --cors-configuration file://cors-config.json

 # Verify the CORS configuration
 aws s3api get-bucket-cors --bucket my-unique-bucket-name-123
Task 4: Configure Access Control and Security
Steps:
-
Implement a Bucket Policy for Security:
- Bucket policies are JSON documents that define what actions are allowed or denied:
# Create a bucket policy file cat > bucket-policy.json << EOF { "Version": "2012-10-17", "Statement": [ { "Sid": "PublicReadForGetBucketObjects", "Effect": "Allow", "Principal": "*", "Action": "s3:GetObject", "Resource": "arn:aws:s3:::my-unique-bucket-name-123/public/*" }, { "Sid": "IPRestrictionForAdminAccess", "Effect": "Deny", "Principal": "*", "Action": [ "s3:DeleteBucket", "s3:PutBucketPolicy", "s3:DeleteObject" ], "Resource": [ "arn:aws:s3:::my-unique-bucket-name-123", "arn:aws:s3:::my-unique-bucket-name-123/*" ], "Condition": { "NotIpAddress": { "aws:SourceIp": [ "192.0.2.0/24", "203.0.113.0/24" ] } } } ] } EOF # Apply the bucket policy aws s3api put-bucket-policy \ --bucket my-unique-bucket-name-123 \ --policy file://bucket-policy.json # Verify the policy was applied aws s3api get-bucket-policy \ --bucket my-unique-bucket-name-123 \ --output text \ --query Policy | jq . -
Enable Default Encryption for Enhanced Security:
- Configure default encryption to automatically encrypt all uploaded objects:
# Set default encryption using SSE-S3 (Amazon S3-managed keys) aws s3api put-bucket-encryption \ --bucket my-unique-bucket-name-123 \ --server-side-encryption-configuration '{ "Rules": [ { "ApplyServerSideEncryptionByDefault": { "SSEAlgorithm": "AES256" }, "BucketKeyEnabled": true } ] }' # To use customer managed KMS keys instead: # aws s3api put-bucket-encryption \ # --bucket my-unique-bucket-name-123 \ # --server-side-encryption-configuration '{ # "Rules": [ # { # "ApplyServerSideEncryptionByDefault": { # "SSEAlgorithm": "aws:kms", # "KMSMasterKeyID": "YOUR-KMS-KEY-ARN" # }, # "BucketKeyEnabled": true # } # ] # }' # Verify encryption settings aws s3api get-bucket-encryption --bucket my-unique-bucket-name-123 -
Configure Block Public Access Settings:
- Block public access at the bucket level to prevent accidental exposure:
# Block all public access aws s3api put-public-access-block \ --bucket my-unique-bucket-name-123 \ --public-access-block-configuration '{ "BlockPublicAcls": true, "IgnorePublicAcls": true, "BlockPublicPolicy": true, "RestrictPublicBuckets": true }' # Verify the block public access settings aws s3api get-public-access-block --bucket my-unique-bucket-name-123 # If you specifically need public access for certain objects (like a website): # aws s3api put-public-access-block \ # --bucket my-unique-bucket-name-123 \ # --public-access-block-configuration '{ # "BlockPublicAcls": false, # "IgnorePublicAcls": false, # "BlockPublicPolicy": false, # "RestrictPublicBuckets": false # }' -
Enable S3 Access Logging:
- Track all requests to your bucket for security auditing and compliance:
# Create a dedicated logging bucket (best practice) aws s3 mb s3://my-logs-bucket-123 --region ap-south-1 # Set up server access logging aws s3api put-bucket-logging \ --bucket my-unique-bucket-name-123 \ --bucket-logging-status '{ "LoggingEnabled": { "TargetBucket": "my-logs-bucket-123", "TargetPrefix": "logs/my-unique-bucket-name-123/" } }' # Verify logging configuration aws s3api get-bucket-logging --bucket my-unique-bucket-name-123 -
Implement Cross-Account Access (Optional):
- Grant specific permissions to another AWS account without making data public:
 # Create a bucket policy allowing cross-account access
 cat > cross-account-policy.json << EOF
 {
   "Version": "2012-10-17",
   "Statement": [
     {
       "Sid": "CrossAccountAccess",
       "Effect": "Allow",
       "Principal": {
         "AWS": "arn:aws:iam::123456789012:root"
       },
       "Action": [
         "s3:GetObject",
         "s3:ListBucket"
       ],
       "Resource": [
         "arn:aws:s3:::my-unique-bucket-name-123",
         "arn:aws:s3:::my-unique-bucket-name-123/*"
       ]
     }
   ]
 }
 EOF

 # Apply the policy (careful not to overwrite existing policies)
 aws s3api put-bucket-policy \
   --bucket my-unique-bucket-name-123 \
   --policy file://cross-account-policy.json
Task 5: Implement Lifecycle Policies for Cost Optimization
flowchart TD
    subgraph "S3 Storage Classes & Lifecycle"
        Upload([New Data Upload]) -->|Day 0| Standard[S3 Standard]
        Standard -->|After 30 days| IA[S3 Standard-IA]
        IA -->|After 90 days| Glacier[S3 Glacier]
        Glacier -->|After 365 days| Deep[S3 Glacier Deep Archive]
        Deep -->|After 2555 days| Delete([Delete])

        AccessPattern1([Frequent Access
High Performance]) -.-> Standard
        AccessPattern2([Infrequent Access
Cost Savings]) -.-> IA
        AccessPattern3([Rare Access
Long-term Archive]) -.-> Glacier
        AccessPattern4([Legal/Compliance
Retention]) -.-> Deep
    end

    classDef standard fill:#FF9900,stroke:#E65100,color:white;
    classDef ia fill:#42A5F5,stroke:#0D47A1,color:white;
    classDef glacier fill:#78909C,stroke:#37474F,color:white;
    classDef deep fill:#455A64,stroke:#263238,color:white;
    classDef access fill:#ECEFF1,stroke:#607D8B,color:black;
    classDef action fill:#E0E0E0,stroke:#9E9E9E,color:black;

    class Standard standard;
    class IA ia;
    class Glacier glacier;
    class Deep deep;
    class AccessPattern1,AccessPattern2,AccessPattern3,AccessPattern4 access;
    class Upload,Delete action;
Steps:
-
Understand S3 Storage Classes:
- Before setting up lifecycle rules, understand the available storage classes:
# Create a document explaining storage classes for reference cat > storage-classes-reference.txt << EOF S3 Storage Classes: 1. STANDARD - Default storage class, highest availability, lowest latency - Use for: Active, frequently accessed data - Cost: Highest storage cost, lowest access cost 2. INTELLIGENT_TIERING - Automatically moves objects between tiers - Use for: Data with unknown or changing access patterns - Cost: Small monitoring fee, but optimizes between frequent and infrequent tiers 3. STANDARD_IA (Infrequent Access) - Lower storage cost, higher retrieval cost - Use for: Data accessed monthly, needs millisecond access - Cost: Lower storage cost than Standard, but retrieval fee applies 4. ONEZONE_IA - Like STANDARD_IA but in only one AZ (less durable) - Use for: Replaceable data that isn't accessed often - Cost: Cheapest of the IA options 5. GLACIER - Archival storage with retrieval times in minutes to hours - Use for: Long-term archives accessed a few times per year - Cost: Very low storage cost, higher retrieval costs with delays 6. DEEP_ARCHIVE - Lowest cost storage with retrieval times in hours - Use for: Long-term data retention, accessed rarely (once or twice per year) - Cost: Lowest storage cost, highest retrieval cost with longest delays EOF -
Create a Comprehensive Lifecycle Policy:
- Create a policy that transitions objects through storage classes and eventually expires them:
# Create lifecycle configuration JSON cat > lifecycle-policy.json << EOF { "Rules": [ { "ID": "DataLifecycleRule", "Status": "Enabled", "Prefix": "data/", "Transitions": [ { "Days": 30, "StorageClass": "STANDARD_IA" }, { "Days": 90, "StorageClass": "GLACIER" }, { "Days": 180, "StorageClass": "DEEP_ARCHIVE" } ], "Expiration": { "Days": 365 } }, { "ID": "LogsLifecycleRule", "Status": "Enabled", "Prefix": "logs/", "Transitions": [ { "Days": 15, "StorageClass": "STANDARD_IA" }, { "Days": 30, "StorageClass": "GLACIER" } ], "Expiration": { "Days": 90 } }, { "ID": "DeleteIncompleteMultipartUploads", "Status": "Enabled", "Prefix": "", "AbortIncompleteMultipartUpload": { "DaysAfterInitiation": 7 } } ] } EOF # Apply the lifecycle configuration aws s3api put-bucket-lifecycle-configuration \ --bucket my-unique-bucket-name-123 \ --lifecycle-configuration file://lifecycle-policy.json # Verify the lifecycle configuration aws s3api get-bucket-lifecycle-configuration \ --bucket my-unique-bucket-name-123 -
Test the Lifecycle Configuration:
- Upload test files and monitor their transitions:
# Create test files in different prefixes mkdir -p test_files/data test_files/logs # Create some data files echo "This is test data content" > test_files/data/test_data_file.txt # Create some log files echo "This is test log content" > test_files/logs/test_log_file.txt # Upload with specific date metadata for testing aws s3 cp test_files/data/test_data_file.txt \ s3://my-unique-bucket-name-123/data/test_data_file.txt \ --metadata "uploaded=$(date -u +'%Y-%m-%d')" aws s3 cp test_files/logs/test_log_file.txt \ s3://my-unique-bucket-name-123/logs/test_log_file.txt \ --metadata "uploaded=$(date -u +'%Y-%m-%d')" # Monitor the storage class of the objects over time aws s3api head-object \ --bucket my-unique-bucket-name-123 \ --key data/test_data_file.txt \ --query '[StorageClass, Metadata]' # Note: You won't see immediate transitions; they happen based on the schedule # Set calendar reminders to check after the transition days have passed -
Enable S3 Storage Lens for Cost Analysis:
- Set up S3 Storage Lens to gain insights on storage usage and optimize costs:
# Create a Storage Lens configuration cat > storage-lens-config.json << EOF { "Id": "my-bucket-lens", "StorageLensConfiguration": { "Id": "my-bucket-lens", "IsEnabled": true, "AccountLevel": { "ActivityMetrics": { "IsEnabled": true }, "BucketLevel": { "ActivityMetrics": { "IsEnabled": true }, "PrefixLevel": { "StorageMetrics": { "IsEnabled": true, "SelectionCriteria": { "MaxDepth": 5, "MinStorageBytesPercentage": 1.0 } } } } }, "Include": { "Buckets": [ "arn:aws:s3:::my-unique-bucket-name-123" ] } } } EOF # Apply the Storage Lens configuration aws s3control put-storage-lens-configuration \ --account-id $(aws sts get-caller-identity --query Account --output text) \ --config-id my-bucket-lens \ --storage-lens-configuration file://storage-lens-config.json -
Set Up S3 Inventory for Large Buckets:
- For large buckets, set up inventory reports to track objects and their metadata:
 # Create inventory configuration
 cat > inventory-config.json << EOF
 {
   "Destination": {
     "S3BucketDestination": {
       "AccountId": "$(aws sts get-caller-identity --query Account --output text)",
       "Bucket": "arn:aws:s3:::my-logs-bucket-123",
       "Format": "CSV",
       "Prefix": "inventory"
     }
   },
   "IsEnabled": true,
   "Id": "InventoryReport",
   "IncludedObjectVersions": "Current",
   "Schedule": {
     "Frequency": "Weekly"
   },
   "OptionalFields": [
     "Size",
     "LastModifiedDate",
     "StorageClass",
     "ETag",
     "IsMultipartUploaded",
     "ReplicationStatus",
     "EncryptionStatus",
     "ObjectLockRetainUntilDate",
     "ObjectLockMode",
     "ObjectLockLegalHoldStatus"
   ]
 }
 EOF

 # Apply the inventory configuration
 aws s3api put-bucket-inventory-configuration \
   --bucket my-unique-bucket-name-123 \
   --id InventoryReport \
   --inventory-configuration file://inventory-config.json
Task 6: Clean Up Resources
Steps:
-
List All Objects in the Bucket:
- Before deleting, list and review all objects:
# List all objects in the bucket aws s3 ls s3://my-unique-bucket-name-123 --recursive # If you have many objects, consider using pagination aws s3api list-objects-v2 \ --bucket my-unique-bucket-name-123 \ --query 'Contents[].[Key]' \ --output text -
Delete All Objects from the Bucket:
- Remove all objects (required before bucket deletion):
# Delete all objects without versioning consideration aws s3 rm s3://my-unique-bucket-name-123 --recursive # If versioning is enabled, you need to delete all versions # First, list all object versions aws s3api list-object-versions \ --bucket my-unique-bucket-name-123 \ --output json > object-versions.json # For a proper cleanup of versioned objects, you would need to write a script # Here's a simple example using jq (install with: sudo apt install jq) # Delete delete markers cat object-versions.json | \ jq -r '.DeleteMarkers[] | select(.Key != null) | "\(.Key) \(.VersionId)"' | \ while read -r key version_id; do echo "Deleting delete marker $key ($version_id)" aws s3api delete-object \ --bucket my-unique-bucket-name-123 \ --key "$key" \ --version-id "$version_id" done # Delete versions cat object-versions.json | \ jq -r '.Versions[] | select(.Key != null) | "\(.Key) \(.VersionId)"' | \ while read -r key version_id; do echo "Deleting version $key ($version_id)" aws s3api delete-object \ --bucket my-unique-bucket-name-123 \ --key "$key" \ --version-id "$version_id" done -
Remove Bucket Configuration Settings:
- Clean up configuration before bucket deletion:
# Remove lifecycle configuration aws s3api delete-bucket-lifecycle --bucket my-unique-bucket-name-123 # Remove inventory configuration aws s3api delete-bucket-inventory-configuration \ --bucket my-unique-bucket-name-123 \ --id InventoryReport # Remove bucket policy aws s3api delete-bucket-policy --bucket my-unique-bucket-name-123 # Remove CORS configuration aws s3api delete-bucket-cors --bucket my-unique-bucket-name-123 # Remove encryption configuration # Note: This may not be allowed by organizations with strict security policies # aws s3api delete-bucket-encryption --bucket my-unique-bucket-name-123 # Remove logging configuration aws s3api put-bucket-logging \ --bucket my-unique-bucket-name-123 \ --bucket-logging-status '{}' -
Delete the S3 Bucket:
- Finally, delete the empty bucket:
# Delete the bucket aws s3api delete-bucket --bucket my-unique-bucket-name-123 # Verify the bucket no longer exists aws s3 ls | grep my-unique-bucket-name-123 # No output means the bucket has been successfully deleted -
Document Lessons Learned:
- Create a document to record your S3 experience:
 # Create a lessons learned document
 cat > s3-lessons-learned.md << EOF
 # S3 Bucket Management Lessons Learned

 ## Best Practices Implemented
 - Used versioning to protect against accidental deletions
 - Implemented lifecycle policies for cost optimization
 - Applied bucket policies to control access
 - Enabled default encryption for all objects
 - Set up access logging for security and compliance

 ## Challenges Encountered
 - [Document any issues you faced]
 - [Document how you resolved them]

 ## Cost Optimization Techniques
 - Used lifecycle policies to transition infrequently accessed data
 - Cleaned up incomplete multipart uploads
 - Implemented expiration rules for temporary data

 ## Security Measures
 - Blocked public access
 - Used bucket policies to restrict access
 - Enabled default encryption
 - Implemented cross-region replication for critical data

 ## Future Improvements
 - [Document what you would do differently next time]
 - [List additional features to explore]
 EOF
These comprehensive steps demonstrate the full S3 bucket lifecycle from creation to management to deletion, with best practices for security, cost optimization, and data management throughout.
# Create a detailed lifecycle policy file
cat > lifecycle-policy.json << EOF
{
  "Rules": [
    {
      "ID": "LogsArchivalRule",
      "Status": "Enabled",
      "Filter": {
        "Prefix": "logs/"
      },
      "Transitions": [
        {
          "Days": 30,
          "StorageClass": "STANDARD_IA"
        },
        {
          "Days": 90,
          "StorageClass": "GLACIER"
        }
      ],
      "Expiration": {
        "Days": 365
      }
    },
    {
      "ID": "DocumentsArchivalRule",
      "Status": "Enabled",
      "Filter": {
        "Prefix": "documents/"
      },
      "Transitions": [
        {
          "Days": 60,
          "StorageClass": "STANDARD_IA"
        },
        {
          "Days": 180,
          "StorageClass": "GLACIER"
        }
      ],
      "NoncurrentVersionTransitions": [
        {
          "NoncurrentDays": 30,
          "StorageClass": "STANDARD_IA"
        }
      ],
      "NoncurrentVersionExpiration": {
        "NoncurrentDays": 90
      }
    },
    {
      "ID": "CleanupTempFiles",
      "Status": "Enabled",
      "Filter": {
        "Prefix": "temp/"
      },
      "Expiration": {
        "Days": 7
      },
      "AbortIncompleteMultipartUpload": {
        "DaysAfterInitiation": 1
      }
    }
  ]
}
EOF

# Apply the lifecycle policy to your bucket
aws s3api put-bucket-lifecycle-configuration \
  --bucket my-unique-bucket-name-123 \
  --lifecycle-configuration file://lifecycle-policy.json

# Verify the lifecycle configuration was applied
aws s3api get-bucket-lifecycle-configuration --bucket my-unique-bucket-name-123
-
Test and Monitor Lifecycle Transitions:
- Upload some test files to verify the lifecycle policy:
# Create test files in each of the managed directories echo "Sample log file" > sample-log.txt echo "Sample document" > sample-document.txt echo "Temporary file" > temp-file.txt # Upload to the appropriate prefixes aws s3 cp sample-log.txt s3://my-unique-bucket-name-123/logs/ aws s3 cp sample-document.txt s3://my-unique-bucket-name-123/documents/ aws s3 cp temp-file.txt s3://my-unique-bucket-name-123/temp/ # To verify transitions (would normally wait 30+ days, this is just to check status) aws s3api head-object \ --bucket my-unique-bucket-name-123 \ --key logs/sample-log.txt # Set up CloudWatch Metrics for S3 to monitor storage use by storage class # This is done in the S3 console: S3 > Bucket > Management > Metrics > Create filter -
Create Cost Analysis Report:
- To understand the cost impact of your lifecycle policies:
 # First, upload additional sample data to demonstrate
 for i in {1..10}; do
   dd if=/dev/urandom bs=1M count=10 | aws s3 cp - s3://my-unique-bucket-name-123/logs/large-file-$i.bin
   dd if=/dev/urandom bs=1M count=5 | aws s3 cp - s3://my-unique-bucket-name-123/documents/doc-$i.bin
 done

 # Get the storage usage before transitions
 aws s3api list-objects-v2 \
   --bucket my-unique-bucket-name-123 \
   --query "sum(Contents[].Size)" \
   --output text

 # Create a report documenting the potential cost savings
 cat > lifecycle-savings-analysis.txt << EOF
 Lifecycle Policy Cost Savings Analysis:

 Initial Storage (All in STANDARD):
 - 10 log files x 10MB = 100MB in STANDARD: $0.023/GB/month = $0.0023/month
 - 10 documents x 5MB = 50MB in STANDARD: $0.023/GB/month = $0.00115/month
 - Total: $0.00345/month

 After 30 days:
 - 100MB logs moved to STANDARD_IA: $0.0125/GB/month = $0.00125/month
 - 50MB documents remain in STANDARD = $0.00115/month
 - Total: $0.0024/month (30% savings)

 After 90 days:
 - 100MB logs moved to GLACIER: $0.004/GB/month = $0.0004/month
 - 50MB documents moved to STANDARD_IA = $0.000625/month
 - Total: $0.001025/month (70% savings)

 After 180 days:
 - 100MB logs remain in GLACIER = $0.0004/month
 - 50MB documents moved to GLACIER = $0.0002/month
 - Total: $0.0006/month (83% savings)

 After 365 days:
 - Logs expired (deleted) = $0/month
 - 50MB documents remain in GLACIER = $0.0002/month
 - Total: $0.0002/month (94% savings)

 Note: This ignores retrieval costs, one-time transition costs,
 and uses simplified pricing. Actual savings will depend on access patterns.
 EOF
Task 6: Clean Up Resources
Steps:
-
List and Check Objects Before Deletion:
- Before deleting anything, verify what exists to avoid accidental data loss:
# List all objects in the bucket to verify what will be deleted aws s3 ls s3://my-unique-bucket-name-123/ --recursive # Count the total number of objects aws s3api list-objects-v2 \ --bucket my-unique-bucket-name-123 \ --query "length(Contents[])" \ --output text # Check the total size of all objects aws s3api list-objects-v2 \ --bucket my-unique-bucket-name-123 \ --query "sum(Contents[].Size)" \ --output text -
Selective Deletion:
- Delete specific files or directories:
# Delete a single file aws s3 rm s3://my-unique-bucket-name-123/remote-file.txt # Delete all files in a "directory" aws s3 rm s3://my-unique-bucket-name-123/remote-directory/ --recursive # Delete files matching a pattern aws s3 rm s3://my-unique-bucket-name-123/ --recursive --exclude "*" --include "*.tmp" # Dry run to verify what would be deleted without actually deleting aws s3 rm s3://my-unique-bucket-name-123/logs/ --recursive --dryrun -
Delete All Versioned Objects:
- For versioned buckets, you need to delete all versions:
# First, identify if the bucket has versioning enabled aws s3api get-bucket-versioning --bucket my-unique-bucket-name-123 # If versioning is enabled, list all versions aws s3api list-object-versions \ --bucket my-unique-bucket-name-123 \ --output text \ --query 'Versions[*].[Key,VersionId]' | head # Delete all object versions and delete markers (BE CAREFUL - PERMANENTLY DELETES ALL DATA) # For safety, this is provided as a script rather than a direct command cat > delete-all-versions.sh << 'EOF' #!/bin/bash BUCKET="my-unique-bucket-name-123" echo "WARNING: This will permanently delete ALL versions of ALL objects in $BUCKET" echo "Type 'yes' to continue or anything else to cancel:" read confirmation if [ "$confirmation" != "yes" ]; then echo "Operation cancelled." exit 1 fi # Delete all object versions echo "Deleting all object versions..." versions=$(aws s3api list-object-versions \ --bucket $BUCKET \ --output json \ --query 'Versions[*].[Key, VersionId]') if [ "$versions" != "null" ] && [ "$versions" != "[]" ]; then echo "$versions" | jq -r '.[] | @tsv' | while read key version_id; do echo "Deleting $key ($version_id)..." aws s3api delete-object \ --bucket $BUCKET \ --key "$key" \ --version-id "$version_id" done else echo "No object versions found." fi # Delete all delete markers echo "Deleting all delete markers..." markers=$(aws s3api list-object-versions \ --bucket $BUCKET \ --output json \ --query 'DeleteMarkers[*].[Key, VersionId]') if [ "$markers" != "null" ] && [ "$markers" != "[]" ]; then echo "$markers" | jq -r '.[] | @tsv' | while read key version_id; do echo "Deleting delete marker $key ($version_id)..." aws s3api delete-object \ --bucket $BUCKET \ --key "$key" \ --version-id "$version_id" done else echo "No delete markers found." fi echo "All versions and delete markers removed." EOF # Make the script executable (use only when ready to delete all versions!) chmod +x delete-all-versions.sh ./delete-all-versions.sh -
Delete the Bucket:
- Once all objects are removed (or using the force option):
# Delete an empty bucket aws s3 rb s3://my-unique-bucket-name-123 # Force delete a non-empty bucket (CAUTION - PERMANENTLY DELETES ALL DATA) # Make absolutely sure this is what you want to do aws s3 rb s3://my-unique-bucket-name-123 --force # Verify the bucket no longer exists aws s3 ls | grep my-unique-bucket-name-123 # Should return no output if the bucket was successfully deleted -
Clean Up Local Files:
- Remove the local files created during this tutorial:
 # Clean up local files
 rm -f local-file.txt public-info.txt confidential.txt sample-*.txt
 rm -f bucket-policy.json cors-config.json lifecycle-policy.json
 rm -rf my-local-directory downloaded-files sync-download-test
 rm -f *.txt *.json *.sh

 # Verify clean up
 ls -la
These comprehensive steps demonstrate the full S3 bucket lifecycle from creation to management to deletion, with best practices for security, cost optimization, and data management throughout.
The AWS CLI provides powerful automation capabilities for S3, allowing you to integrate storage operations into your scripts and workflows. This can significantly enhance your productivity when working with cloud storage at scale.
Pro Tip: For frequent operations or teams with multiple AWS accounts, create named profiles using
aws configure --profile profile-nameand use them with--profile profile-namein your commands. This allows you to quickly switch between different AWS accounts without reconfiguring.

